Batch Recurring Payments
Save Time by Sending Payment Requests in Bulk
The Batch Recurring Payments feature lets you send recurring payment request links to multiple payers at once via text and email. Admins can track submission statuses and get instant email alerts when a payer submits their authorization form, keeping you updated in real time.
Accessing the Batch Recurring Payments Form
This form is available to all Desktop users with Family Accounting and Payment Processing permissions.
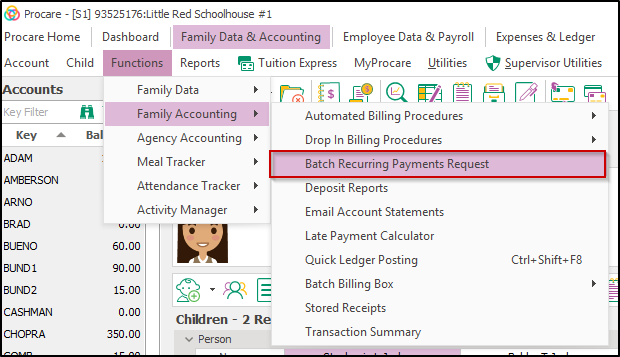
Access it by selecting Family Data & Accounting > Functions > Family Accounting > Batch Recurring Payments Request.
For information on how to send an individual payment request form see Set Up Recurring Payments.
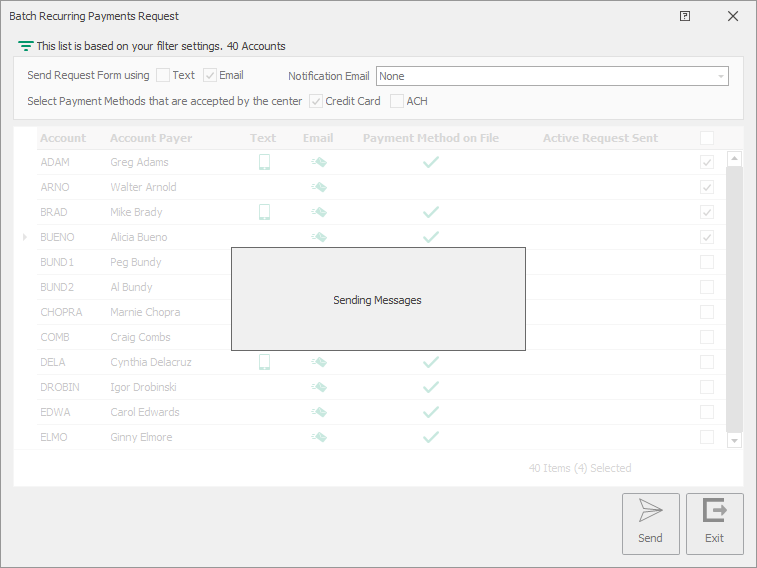
Overview of the Batch Recurring Payments Form
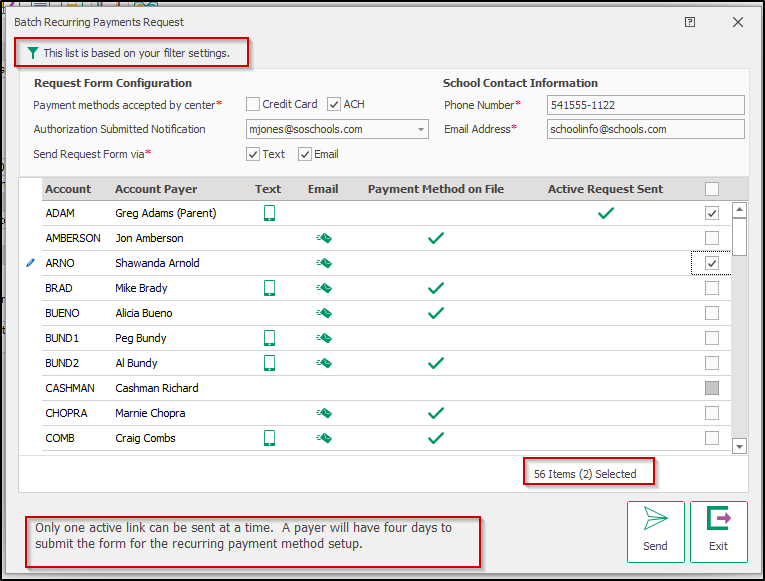
- This list is based on your filter settings, ## Accounts indicates the form will display accounts from any filters in place on the Account Summary screen, and this is the total when the form loaded. The BRPR Form could be filtered further but this count will remain the same.
- Request Form Configuration
- Payment Methods accepted by center allows the center to choose which payment options to display on the request link.
- Authorization Submitted Notification determines the email address that will receive completed authorization forms.
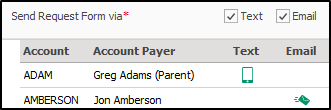
- The Send Request Form via options provides two methods to send the links. Selecting Text will send the authorization form link to the cell phone number set up on the payer’s record. Selecting Email will send the form to the email address on the payer’s record.
- School Contact Information
- The Phone Number and Email Address fields pull from the Edit School Information screen.
- Edit the phone number/email address on this screen or permanently update this information by navigating to Configuration > System > Locations & Users > Regions & Schools > Select a school, then click Edit.
- The contact information will display on the email message received by families allowing them to email or call with any questions regarding the form.
- The Phone Number and Email Address fields pull from the Edit School Information screen.
- The Grid displays the accounts from the initial filter and the following payer information:
- Primary Payer on each account.
- Displays if each payer has a cell phone and/or email address added to their record.
- A checkmark in the Payment Method on File column indicates if there is a current payment method on file.
- A checkmark in the Active Request column indicates if an authorization link is still active for this account.
Important Notes on the Form
- The form loads accounts based on filters from the Account Summary screen; the total count stays fixed until filters change.
- By default, Text and Email will be checked, Authorization Submitted Notification will be set to None and no Payment Methods will be selected.
- Payment methods and notification emails are saved after a successful send but reset if you exit without sending.
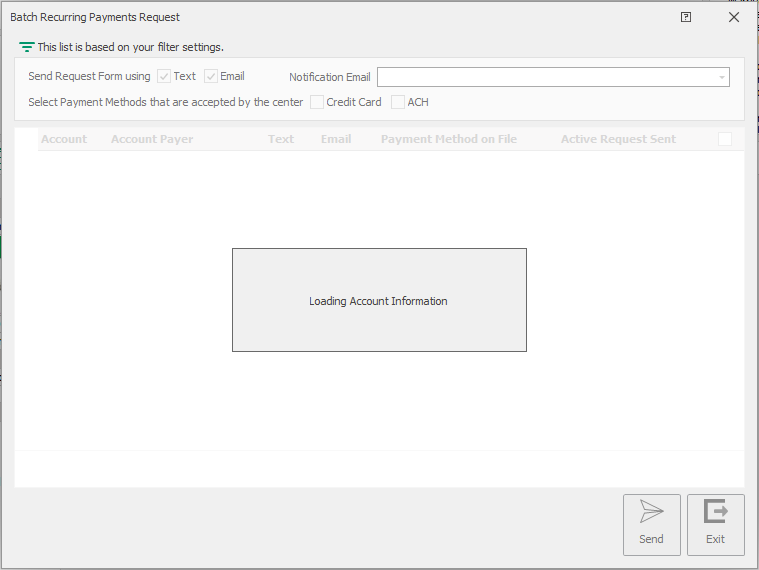
- When opening the form, a “Loading Account Information” message appears while payment method statuses are retrieved.
Choosing an Account Payer
The Primary Payer is selected by default, even without valid contact info. To change the payer:
-
Click the Payer’s name to see other eligible payers (only Payers with at least one valid texting number or email address will appear in the list).

-
Select a different payer from the dropdown.
-
Check that the Text and Email columns update with the new payer’s infomation.
-
Check the account selection box, as it may update automatically based on the new payer’s contact methods.
Managing Active Requests
Authorization links expire four days after being sent, so payers need to complete the form within that timeframe
-
Look for the Active Request checkbox to see if there is a current authorization link for an account.
-
If no checkbox appears, it means the link has either been submitted or has expired.
-
Use the available filters to display accounts with or without active requests.

-
Remember that active links apply to the entire account, so changing the payer will not affect this status.
-
If a link has expired or been submitted, generate a new authorization link by repeating the sending process.
Selecting Accounts to Send Authorization Links
-
First choose whether to send links by Text, Email, or both by checking the appropriate boxes.
-
Review the account list:
- Accounts with a text icon can receive SMS links
- Accounts with an email icon can receive email links
- Only accounts matching your selected methods will have active checkboxes
-
To select accounts:
- Check the box next to each desired account
- Grayed-out boxes mean that account can't receive your chosen method(s)
-
To quickly select all eligible accounts use the Select All checkbox at the top of the list
-
If you change your communication method or switch payers:
- The checkboxes will update automatically
- Accounts that no longer match will become unselected
- New matching accounts will become available for selection
-
Before sending:
- Verify all intended accounts are checked
- Confirm at least one payment method is selected
- Double-check the notification email address
-
The system automatically prevents selecting incompatible accounts by disabling those checkboxes. If an account you expect to see isn't available for selection, check that the payer has the required contact information for your chosen delivery method(s).
Sending Batch Payment Authorization Links
-
Select one or more accounts from the list
-
Click the Send button (activates after selection)
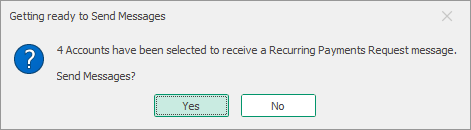
-
You’ll see a progress window while the links send. Wait until it finishes before closing the window.
Troubleshooting
Active Links Detected
- If selected accounts have pending authorization links, the system will display a warning
- Continuing will automatically cancel the existing links
- New links will be generated with a fresh 4-day expiration period
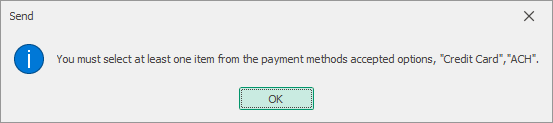
No Payment Method Selected
- The system requires at least one payment method (Credit Card or ACH) to be selected
- If none are chosen, you'll receive an error message
- Simply select your preferred payment options and resend
Manage Methods
The Manage Methods tool lets authorized admins add, update, or remove payment methods on family accounts, including credit cards and ACH. Multiple methods can be saved, and one can be set as the preferred option for recurring payments.
Note: If multiple payment methods are saved to the account, a preferred method can be set. If a transaction does not go through due to insufficient funds or other reasons, the system will not try to collect the amount from any other cards saved on the profile.
See: Recurring Payments for details on adding, updating, or setting a preferred payment method.
