Beginning July 1, 2025, Procare will only be accessible to users within the United States, U.S. Territories, and Canada. If your center is located outside these regions, you will maintain full system access through June 30, 2025.
Action Required by June 30, 2025
To preserve your center's historical records, please export all critical data before your access expires. We recommend exporting essential information including student and staff records, timecards, financial data, and any other reports specific to your center's operations.
For detailed instructions on exporting reports, see our support article.
If you need help during this process, contact our Customer Support team at 1-800-964-1729 or email support@procaresoftware.com during business hours.
Export Instructions
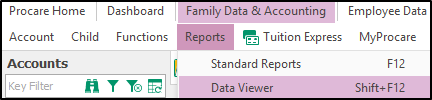
- Open the Procare Client and log in
- Select Family Data & Accounting in the top navigation ribbon
- Select Reports
- Select Data Viewer
Note: While Standard Reports can be exported as formatted documents, this guide focuses on using Data Viewer to export CSV files, which are easier to sort, filter, and edit.
Recommended Reports
Family Data
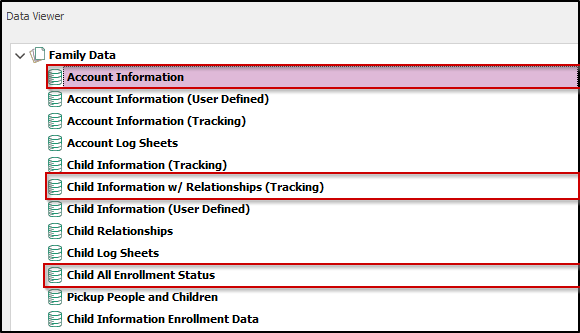
Account Information
- Choose the current date as the As Of Date
- Generate the report
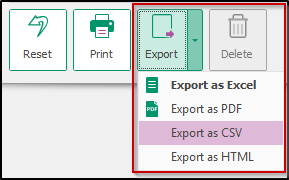
- Click the arrow next to Export in the bottom left
- Select the export format (CSV is recommended)
- Choose a storage location, name the file, and save it
Child Information w/ Relationships (Tracking)
- Choose the current date as the As Of Date
- Generate the report
- Click the arrow next to Export in the bottom left
- Select the export format (CSV is recommended)
- Choose a storage location, name the file, and save it
Child All Enrollment Status
- Select the desired date range: January 1st, 2015 to the current date is recommended
- Generate the report
- Click the arrow next to Export in the bottom left
- Select the export format (CSV is recommended)
- Choose a storage location, name the file, and save it
Family Accounting

Account Ledger Information
- Select the desired date range: January 1st, 2015 to the current date is recommended
- Generate the report
- Click the arrow next to Export in the bottom left
- Select the export format (CSV is recommended)
- Choose a storage location, name the file, and save it
Account Balance Summary
- Select the current date as the As Of Date
- Show Primary Only (this will only show the Primary Payer name instead of all payer names and be easier to read, but can be deselected)
- Generate the report
- Click the arrow next to Export in the bottom left
- Select the export format (CSV is recommended)
- Choose a storage location, name the file, and save it
Agency Accounting

Account-Agency Relationships
- No Parameters Required
- Generate the report
- Click the arrow next to Export in the bottom left
- Select the export format (CSV is recommended)
- Choose a storage location, name the file, and save it
Attendance Tracker

Child Time Card
- Select the desired date range: January 1st, 2015 to current date is recommended
- Generate the report
- Click the arrow next to Export in the bottom left
- Select the export format (CSV is recommended)
- Choose a storage location, name the file, and save it
Employee Data
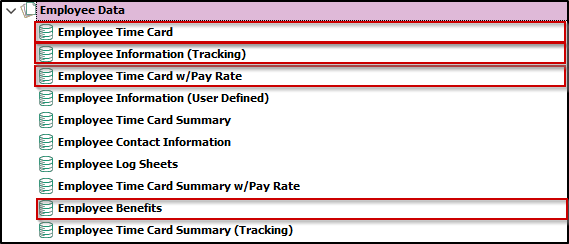
Employee Time Card
- Select the desired date range: January 1st, 2015 to current date is recommended
- Generate the report
- Click the arrow next to Export in the bottom left
- Select the export format (CSV is recommended)
- Choose a storage location, name the file, and save it
Employee Information (Tracking)
- Select the current date as the As Of Date
- Generate the report
- Click the arrow next to Export in the bottom left
- Select the export format (CSV is recommended)
- Choose a storage location, name the file, and save it
Employee Time Card w/ Pay Rate
- Select the desired date range: January 1st, 2015 to current date is recommended
- Generate the report
- Click the arrow next to Export in the bottom left
- Select the export format (CSV is recommended)
- Choose a storage location, name the file, and save it
Employee Benefits
- Select the desired date range: January 1st, 2015 to current date is recommended
- Generate the report
- Click the arrow next to Export in the bottom left
- Select the export format (CSV is recommended)
- Choose a storage location, name the file, and save it
Payroll
It’s recommended to run these reports for each year individually, covering the past seven years (if data is available).

Payroll Checks Summary
- Select the desired date range: Annually for the past seven years is recommended
- Generate the report
- Click the arrow next to Export in the bottom left
- Select the export format (CSV is recommended)
- Choose a storage location, name the file, and save it
Payroll Checks by Withholding
- Select the desired date range: Annually for the past seven years is recommended
- Generate the report
- Click the arrow next to Export in the bottom left
- Select the export format (CSV is recommended)
- Choose a storage location, name the file, and save it
Expenses and Ledger
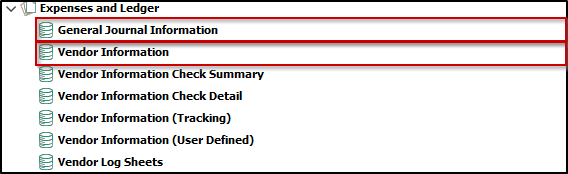
General Journal Information
- Select the desired date range: Annually for the past seven years is recommended
- Generate the report
- Click the arrow next to Export in the bottom left
- Select the export format (CSV is recommended)
- Choose a storage location, name the file, and save it
Vender Information
- No Parameters Required
- Generate the report
- Click the arrow next to Export in the bottom left
- Select the export format (CSV is recommended)
- Choose a storage location, name the file, and save it
Standard Reports / Tax Statements
There are over 500 Standard Reports in Procare that can be used for data exports in a cleanly formatted PDF.
This section will cover how to export Tax Statements to demonstrate the export process, but general report recommendations are not provided.
It is recommended to export any Standard Reports used regularly by your center for data retention purposes.
-
Open the Procare Client and log in
-
Select Family Data & Accounting in the top navigation ribbon
-
Select Reports
-
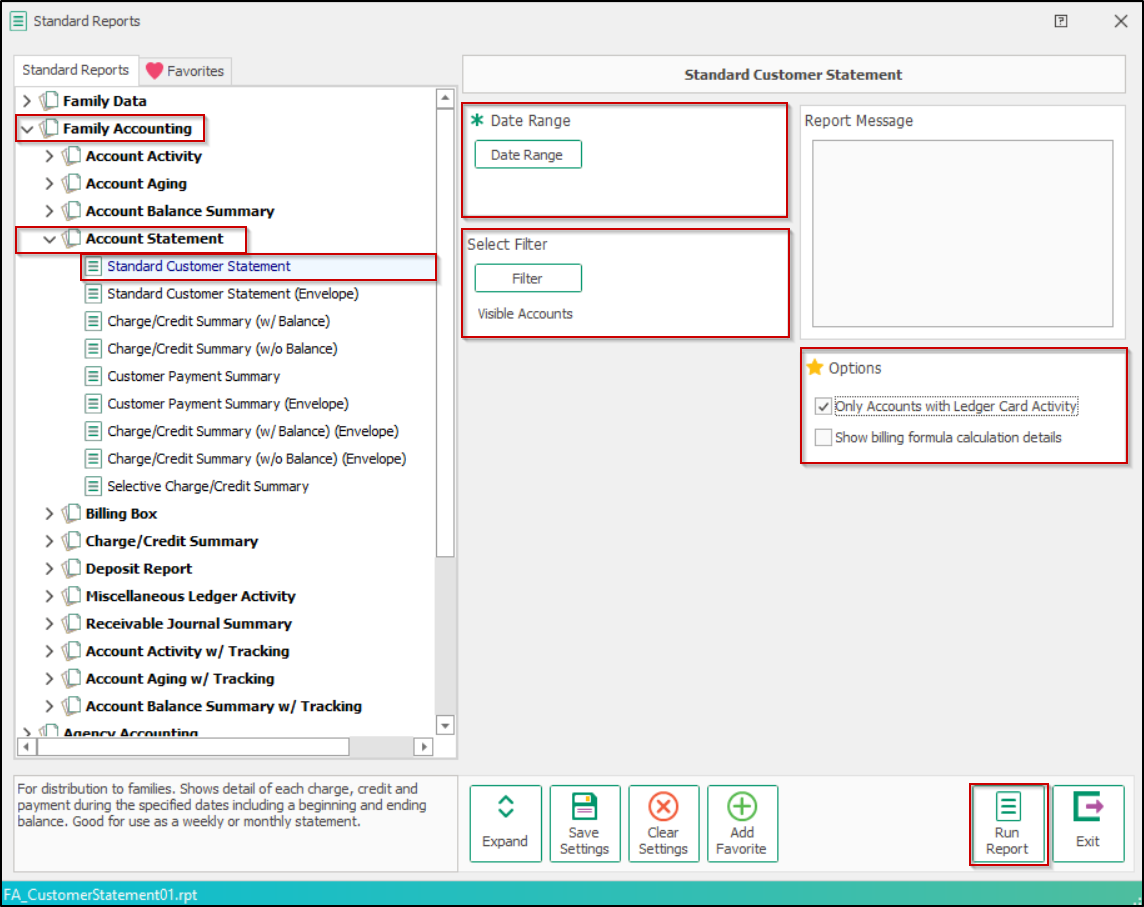
Select Standard Reports
-
Select the desired section (e.g., Family Accounting)
-
Select the desired sub-section (e.g., Account Statement)
-
Select the desired report (e.g., Standard Customer Statement)
-
Select your preferred date range
- Reports can be run for large date ranges, as of the current date, or broken into smaller sections, such as monthly or annually
-
Select Filter when applicable
- The default filter will generally be Visible Accounts, but it is recommended to change this to All Accounts to ensure Hidden Accounts are also captured
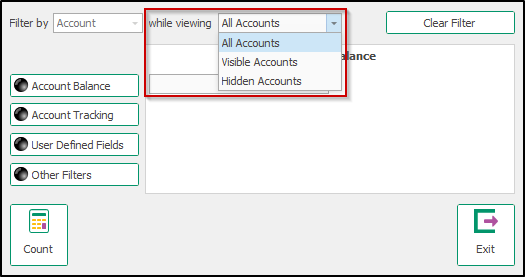
- The default filter will generally be Visible Accounts, but it is recommended to change this to All Accounts to ensure Hidden Accounts are also captured
-
Select preferred Options when applicable
- Standard Reports are custom coded and each report has different optional and required options, it is recommended to choose the options that best fit your data needs
-
Select Run Report
-
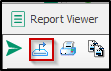
In the Report Viewer window, select the Export option in the upper left of the window
-
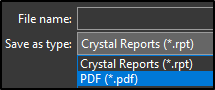
Select the desired file location and name the file
-
Change the Save as type to PDF
-
Save the report
Repeat these steps for any additional Standard Reports you’d like to export.
Repeat the above instruction for all locations located outside of the United States and Canada.
Standard Reports group all accounts together. To get individual information, you'll need to extract or print specific page(s) of the PDF using a PDF viewer.
Troubleshooting Tips
- For large date ranges, try breaking them into smaller periods
- If data appears incomplete, verify that All Accounts is selected instead of only Visible Accounts in the filter settings
- If technical issues arise, try exporting in a different format (Excel instead of CSV)
If any assistance is needed in this process or additional needs are identified, please get in touch with Procare Customer Support at
1-800-964-1729 or email support@procaresoftware.com