Create and send newsletters to parents and staff. Save newsletters as drafts or create templates for later.
Newsletters are a great way to communicate with parents and staff. Customize your text, include attachments, or send a collection of your latest class pictures. Our newsletter builder makes it easy to add content in the layout you want.
Newsletter Permissions
Newsletters can be viewed by staff users with View Only permissions. A staff member must have Full Access to create and send a newsletter.
See Roles and Permissions for more information on how to update permissions for staff.
Click Parent Connection, then select Newsletters.
Click Create New in the top right.

Custom HTML Editor
The Custom HTML editor allows for customization without dropping in the specified boxes. This feature can be very useful for corporate accounts that are setting up templates.
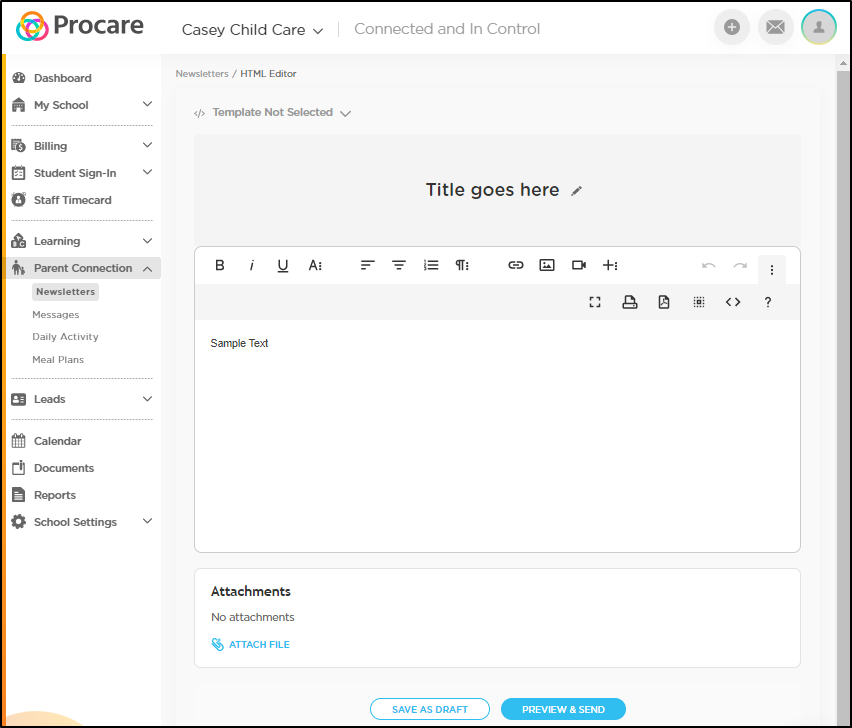
Selecting the custom HTML editor allows you to create a newsletter in plain text or use the code view icon (2 arrows) to create/enter in HTML format. Then save as draft or click Preview & Send (see below for more information on drafts and sending). The following options can also be added:
Up to 4 attachments, with a maximum size of 10MB each.
A video, up to 15MB.
A photo, up to 5MB.
Drag-n-Drop Editor
The drag-n-drop editor allows you to easily select from preset layout options. You can add image or texts boxes and arrange them as you would like.
Start customizing your newsletter by selecting a theme from the bar along the top. This adds a background color or pattern to your newsletter.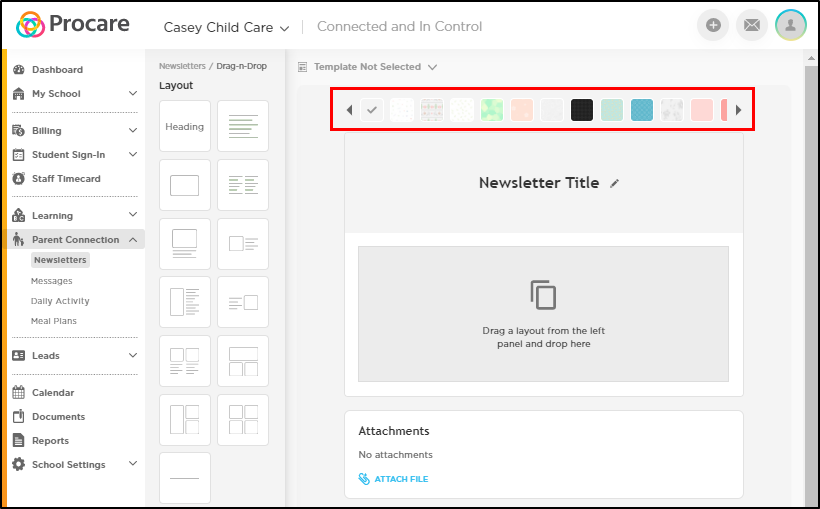
Edit the newsletter title by clicking the pencil icon.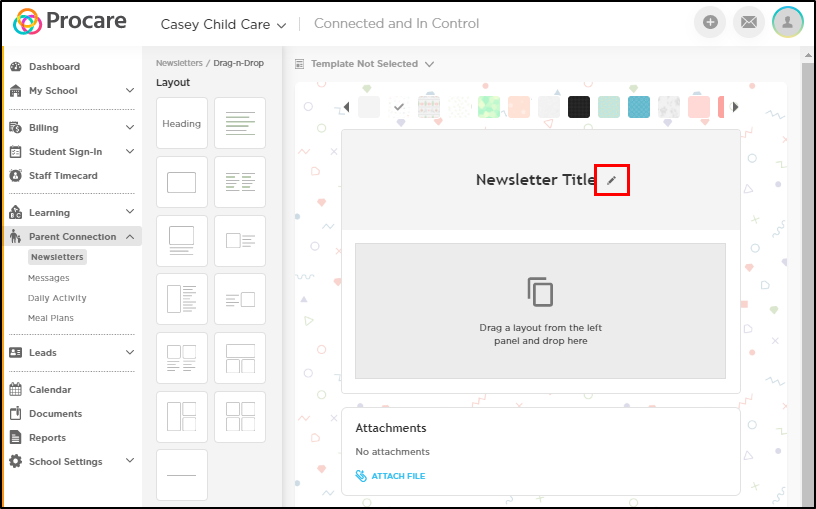
Select a layout option from the left panel to customize the look of your newsletter. Add a layout by clicking, dragging, then dropping into the gray box.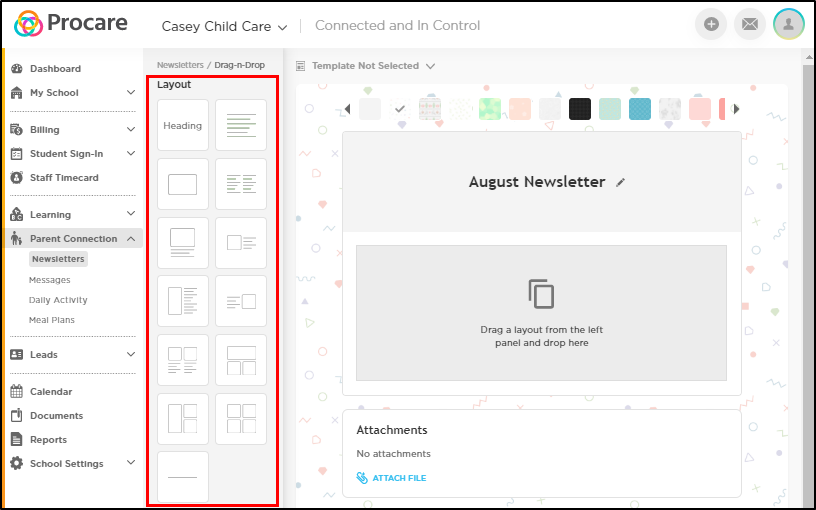
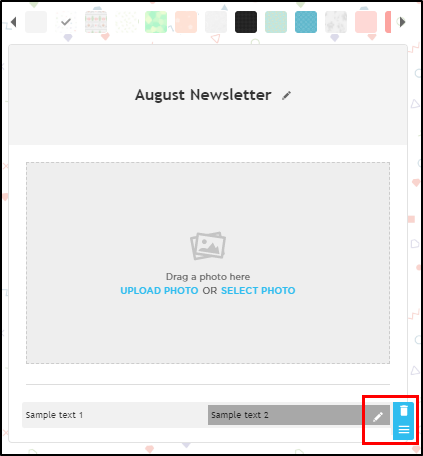
To adjust the content, hover your mouse over a layout box, to display the following:
The pencil icon allows you to edit the text content.
Use the trash can to delete that layout box.
The three horizontal lines are used to drag and drop the layout box to reorganize your letter.
Add Photos
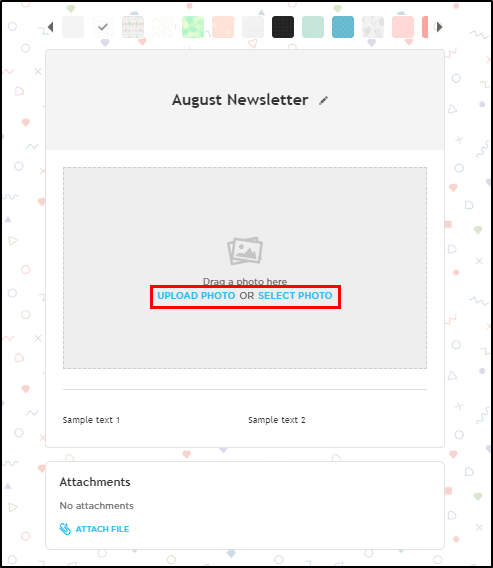
There are two ways to add photos into your newsletter:
Upload Photo allows you to choose a photo from your computer.
Use the Select Photo button to select a photo previously uploaded into Activities.
Once you've selected a photo, the Crop Photo popup will display. Use the slide at the bottom to adjust the size of the photo and ensure the photo fits within the white square.
Please Note: Photos need to be less than 5MB and as aspect ratio of 1.81:1. You can use your computer's photo editor to adjust the size if necessary.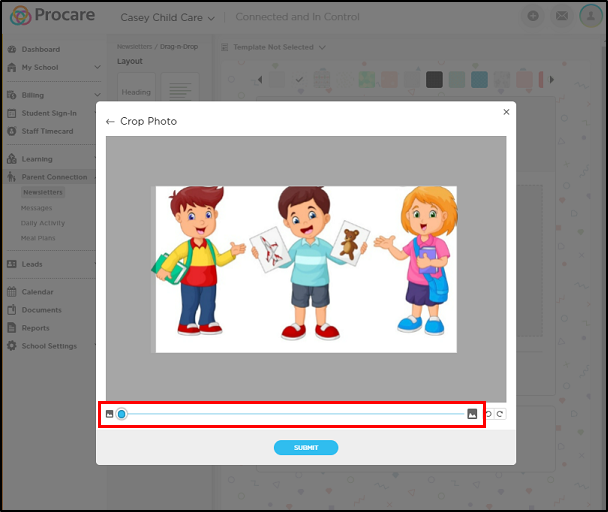
Attach Files
You can attach up to 4 documents to your newsletter, with a maximum size of 10MB each. To attach a file, click the "Attach File" link under the Attachments section. If your file is too large, you may need to compress it before attaching it.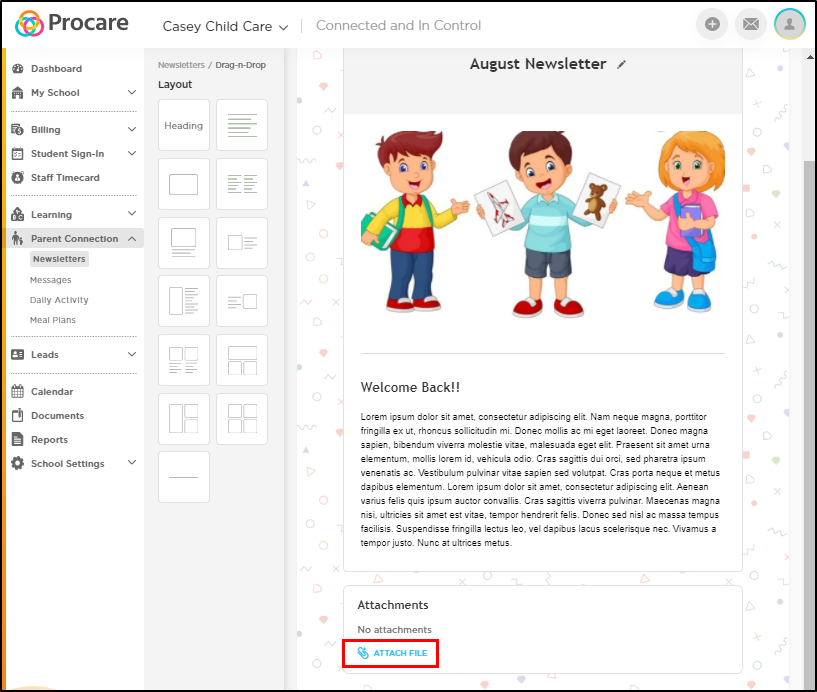
Save As Draft
To save your newsletter to complete at a later time, use the "Save as Draft" option at the bottom of the screen. You can access drafts by selecting the Draft tab from the Parent Connection > Newsletters screen.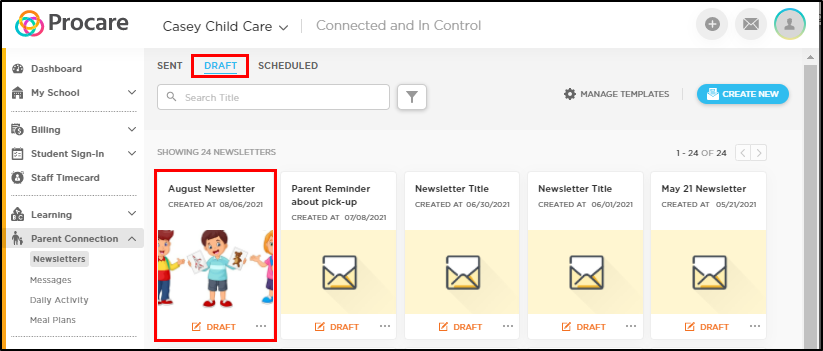
To continue working on a draft, click the newsletter title or image. Use the More Actions icon to make a copy, rename, or delete the draft.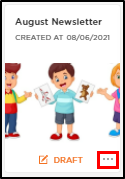
Preview & Send
When you're ready to send the newsletter, click Preview & Send at the bottom.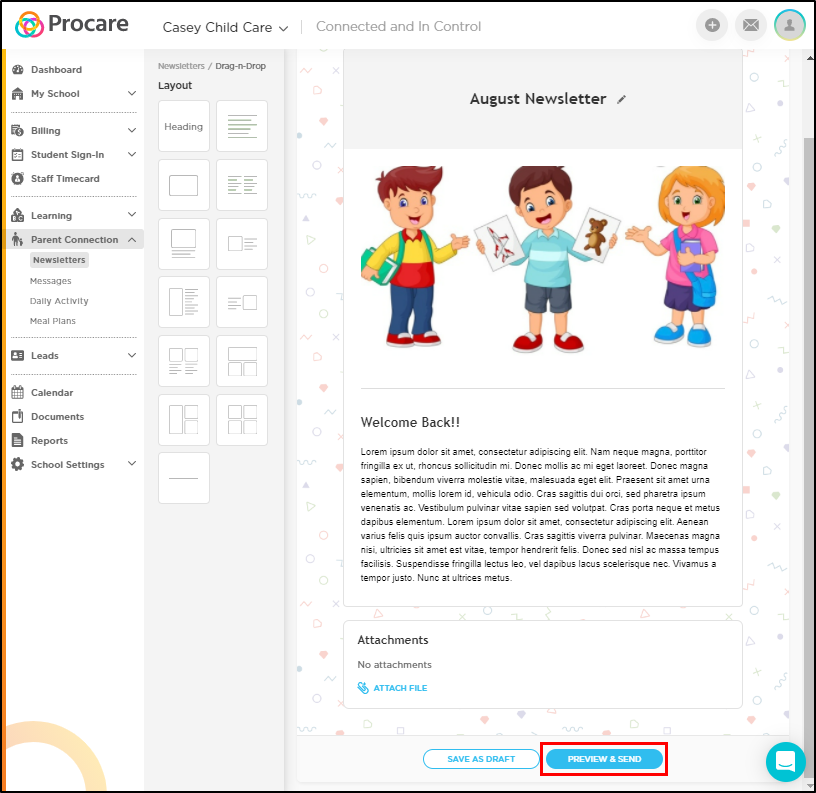
Add Recipients
You can choose to send your newsletters to staff or current, inactive, or graduated students.
Start by selecting Students or Staff, then click Add Recipients.
To send to staff, select the staff members or click Select All.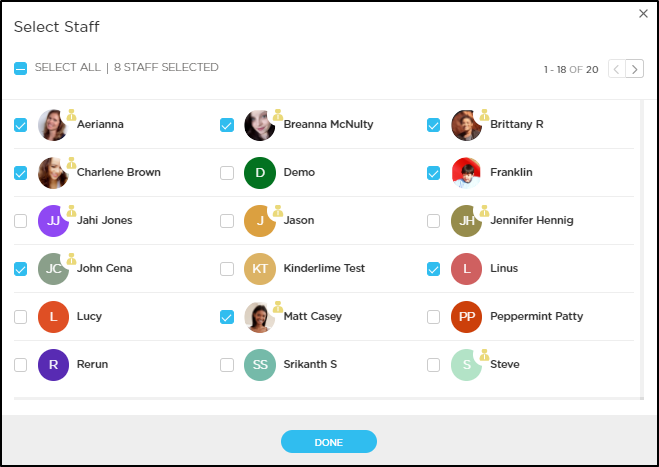
To send to students, use the search box or click the funnel icon to filter the students by Room, Tag, or Enrollment Status (Active, On Hold, Graduate, Inactive).
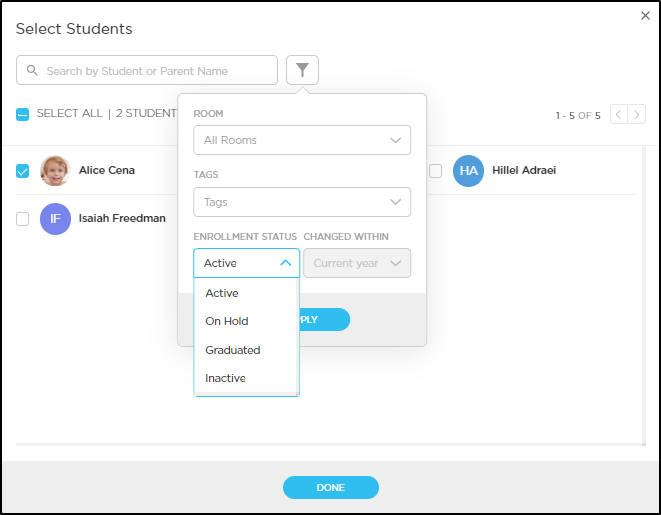
Once the recipients have been selected, click Done. On the Preview Newsletter screen, if necessary, you can change the Reply To email address.
When your newsletter is complete and recipients have been selected, click Send Now to continue sending the newsletter, or click the More Actions icon to Schedule Later or Print as a PDF (see below for more information).
Schedule Later
When selecting Schedule Later, the following popup will display. Select the date and time you wish to have the newsletter send, then click Schedule.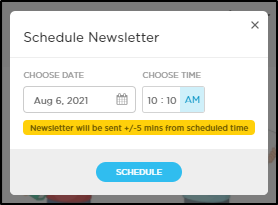
Once a newsletter has been scheduled to send later, it will display in the Scheduled tab under the Parent Connection > Newsletters screen. The Send At time will display on the newsletter. To view or edit the newsletter, click the title or image to open.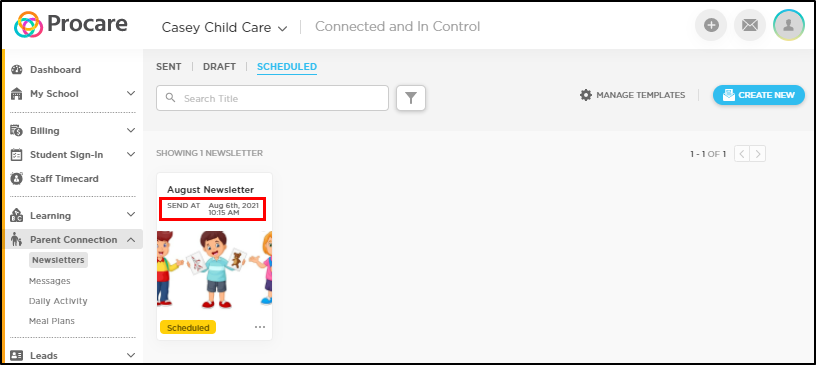
View Your Recipient List
Once your newsletter has been sent, you'll see the total number of recipients in the bottom left corner of the newsletter box. Click the number of recipients to display the names.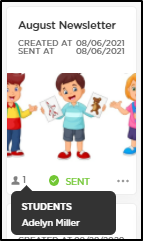
Print as PDF Option
The Print as PDF option allows you to view your newsletter as a PDF to print and post within your school/center. This option is available on the Newsletter > Sent, Draft, and Scheduled screens.
Simply locate the newsletter you wish to print and click the More Actions button. Then select Print as PDF.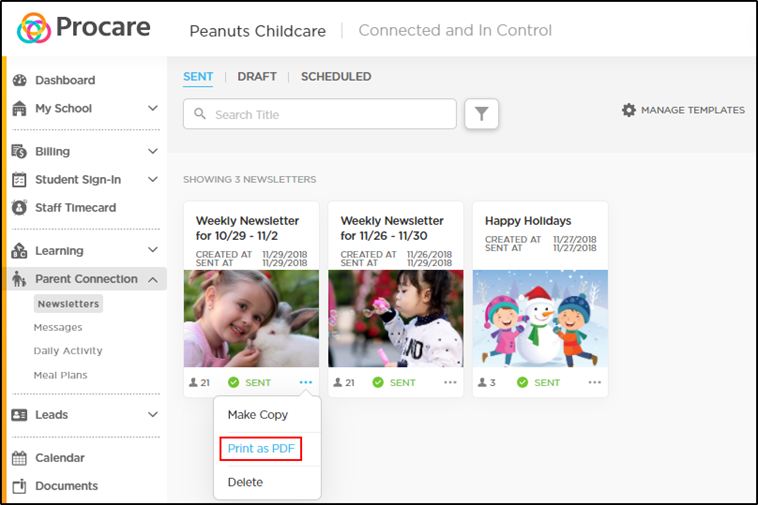
Create Newsletter Templates
If your school regularly uses the same newsletter format or slight variations, you may benefit greatly from the template feature. This allows you to create a newsletter once and then easily access the same newsletter to edit and send out to families.
To view or create templates, go to Parent Connection > Newsletters, then click Manage Templates.
A list of current templates will display along with the date it was created. Use the More Actions icon in the right column to edit or delete the template. To create a new template, click Create Template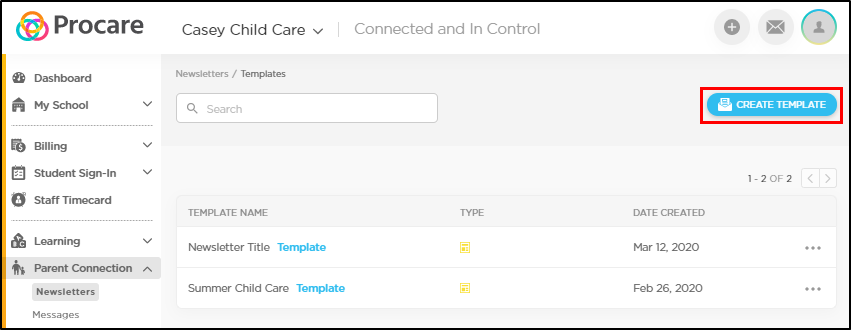
Accessing Saved Templates
Once you have templates saved, they can be accessed by going to Parent Connection > Newsletters > Create New, then select Template Not Selected.
Select the template you wish to use from the Select Newsletter Template popup, then click Choose. Make any necessary edits and continue to Preview & Send.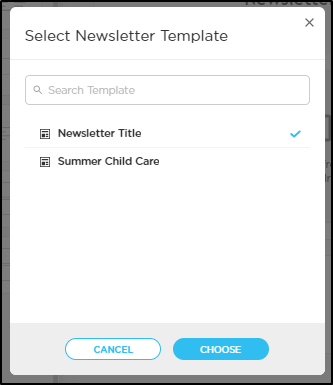
Personalizing Your Newsletter
When sending the newsletter to more than one family, the following preset shortcuts can be used to personalize the letter:
{{parent.firstname}}
{{parent.lastname}}
{{child.firstname}}
{{child.lastname}}
{{school.name}}
{{school.phone}}
{{school.weburl}}
{{school.fulladdress}}
{{school.address}}
{{school.city}}
{{school.state}}
{{school.country}}
{{school.zip}}
When entering a shortcut listed above (exactly as listed, with symbols), that piece of information will be replaced in the newsletter by what is stored in our system.