If your school has enabled autopay, you have the option to set it up while making a payment.
Autopayments include the payment amount for any outstanding balance on the account for invoices with a current or past due invoice date. Future dated invoices will be processed for autopay matching their invoice due date.
Enable Autopay
Before you can enable Autopay, you must have a payment method set up. See: Add, Change, or Remove Your Online Payment Method for instructions. Once a payment method has been added, follow the steps below for setting up autopay.
Click the Menu icon, then select Make Payment.
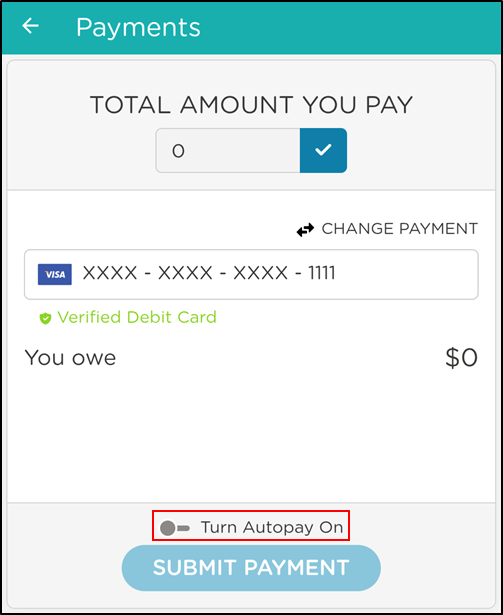
Toggle the Turn Autopay On option.
Failed Autopay Transactions
If an autopay charge fails or is declined, you will receive an email explaining why and can update your payment method from there.
Learn more about Common Error Messages and What They Mean

Disable Autopay
Click the Menu icon, then select Make Payment.
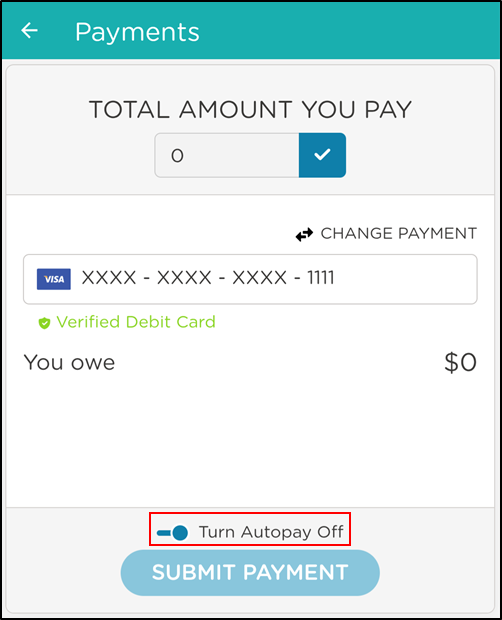
Toggle the Turn Autopay Off option.
Note
If you disable autopay, you will need to initiate the payment every billing cycle.
Additional Information
Autopay will run the oldest payment method on file. If both parents/guardians use the same payment method and an update needs to occur, both parents/guardians must update on each account.
The school retains the ability to manually auto-debit even if autopay is disabled (talk to your school for details).