Managing Tags for Easy Filtering
What It Is
Tags are customizable labels that help you organize and group children based on shared characteristics—such as classroom, schedule, dietary needs, or activity preferences.
Why You’ll Love It
Tags make it easier to quickly filter and find specific groups of students, especially in larger programs. Whether you're tracking attendance, assigning activities, or managing schedules, tags help streamline your workflow and keep things organized.
How to Use It
Apply tags to individual student profiles to group them by any criteria relevant to your program. You can then use these tags to filter students in reports, attendance tracking, and daily planning.
| Program Type | Common Tag Uses |
|---|---|
| Preschools & Daycares | Attendance: Full Day vs. Half Day Staggered Dismissal Times Age Groups: Infants, Toddlers, Pre-K, etc. Grade Levels Allergies Groups Within Each Classroom |
| After Care & Camps | Extracurricular Activities (e.g., Dance, Art, Sports) Weekly Camp Attendance (Week 1, Week 2, etc.) Early Release Staggered Dismissal Times Prepaid Families Drop-In Students |
Creating Tags
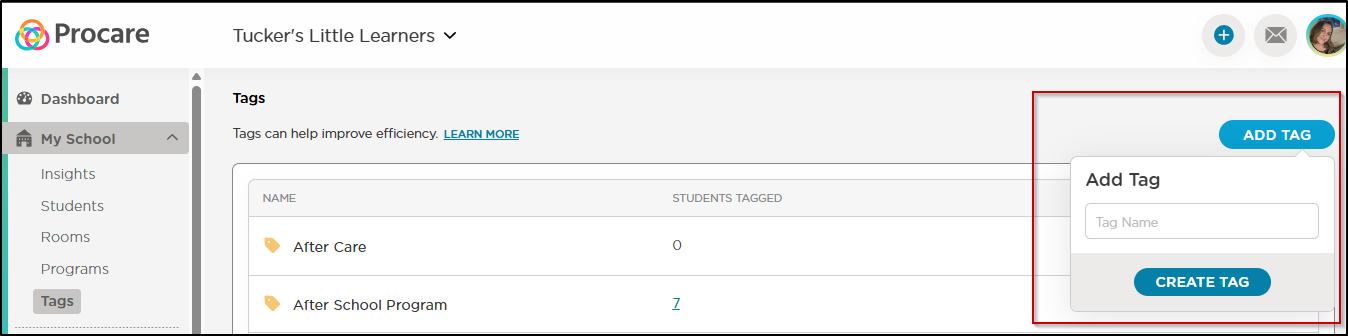
- On the website: go to My School > Tags to add a new tag.
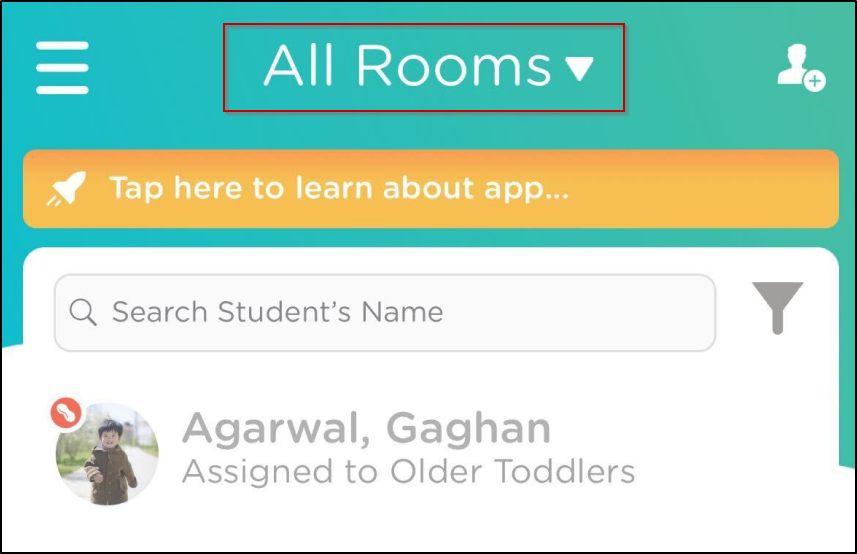
- In the app: Click on the Room at the top of the Home Screen and in the Tags section choose Manage Tags and use the + to create a new Tag.
Assigning Tags
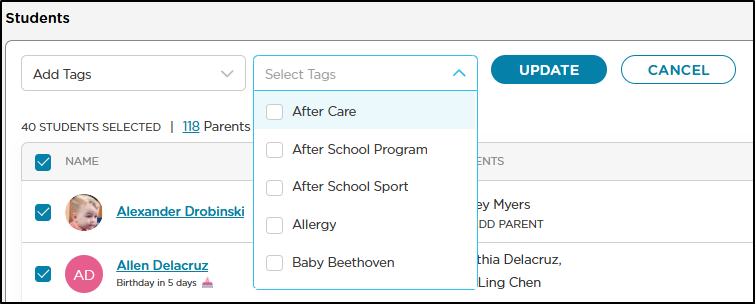
- On the website: go to My School > Students, check the applicable student names and at the top select Batch Action > Add Tags. Select the tags and click Update.
- In the app: Select the name of the student from the home screen, click Edit" and scroll down to select tags.
Filtering by Tags
Once you have applied tags, you will see that you are now able to “Filter by tags” on student lists. You will see this in the following places:
-
In the app: when taking Attendance, click the Room at the top of the screen to apply Tags. See screenshot below:
-
On the website: You will be able to filter by tags throughout the application including in attendance tracking and billing. You can do this by selecting the funnel to the right of a search bar.

NOTE: When multiple tags are used, any children with at least one of those tags will be listed.
Removing or Editing Tags
- On the website: My School > Tags (pencil to edit, trash-can to delete)
- In the app: Click on the Room at the top of the Home Screen and go to the Manage Tags screen. Click on the name of the tag you wish to edit or delete.
Untagging Children
- On the website: Go to My School > Students, click the name of the student, and "Edit Profile" to add or remove tags.
- On the website: Go to My School > Students. Check the box next to the student(s) names and use the Select Batch > Remove Tags option.
- In the app: Click the name of the child from the home screen and scroll down to deselect tags.