Capture meal information and download reports for the CACFP
Are you serving food to children during the day? You can communicate that information to parents and download a spreadsheet with your meal numbers to submit to the Child and Adult Care Food Program (CACFP).
This article will detail how to add a food program status to each child, the food logging process in the app and on the website, how to edit those meals (such as food quantity) and how to pull the meals report.
Food Program Status
A Food Program status can be added to each child's profile by navigating to My School > Students > select a student > Food Program.
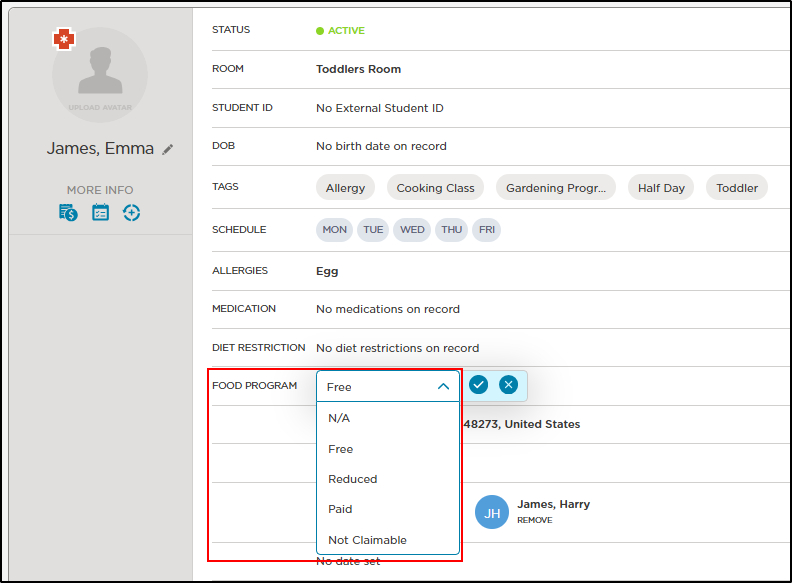
Use the Food Program drop-down to select one of the following statuses:
- N/A
- Free
- Reduced
- Paid
- Not Claimable
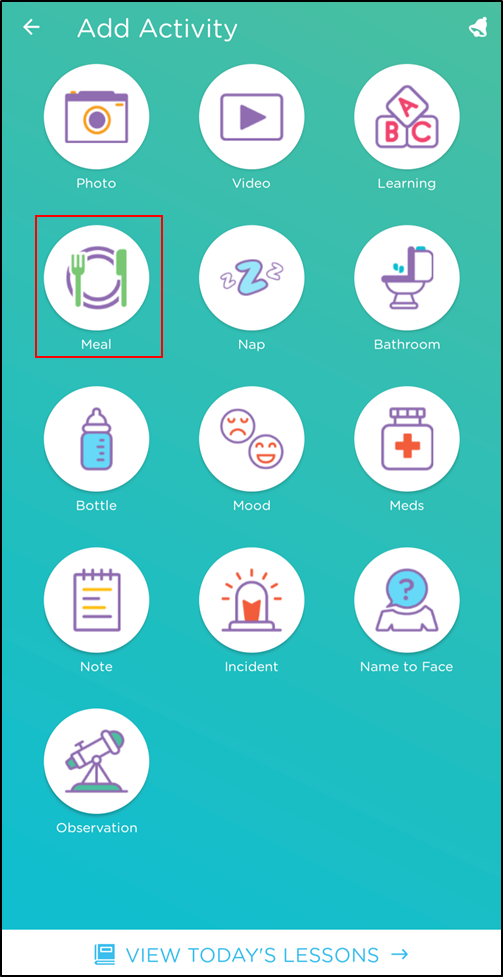
Log Meals in the App
-
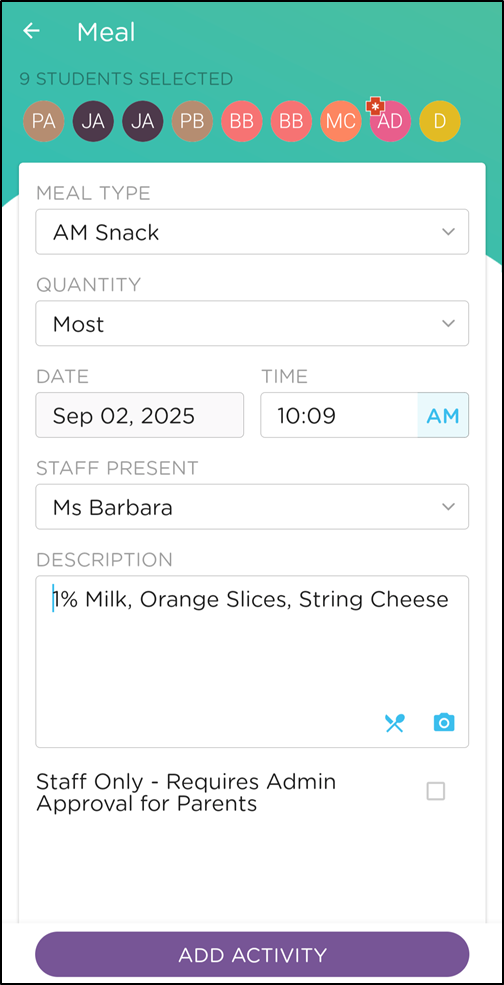
Click Activity, then click Meal.
-
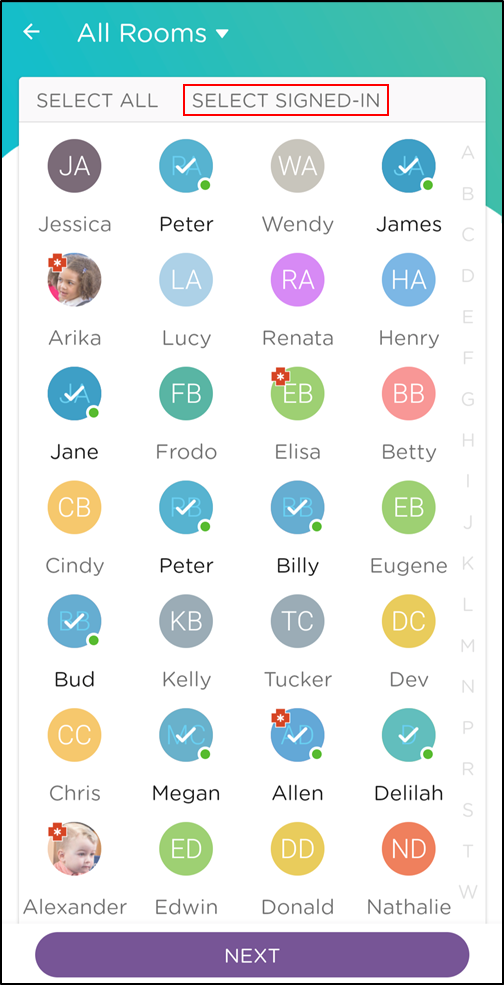
Select the students receiving the meal. Note: Use the filter "Select Signed In" to automatically select all students currently signed in. Then click Next.
-
Complete the Meal activity details:
- Select the Meal Type from the drop-down.
- Choose the quantity of the meal the student consumed.
- Select a time or keep the current time displayed.
- Select the staff member present.
- Enter a description, add meals from the Meal Items list (for details see Meal Items section below), select from your Daily Plan and upload an image.
-
Select Staff Only - Requires Admin Approval for Parents to have this activity reviewed and approved by an admin before sending to parents. Leave this option unchecked to send to parents immediately.
-
Click Add Activity.
Meal Items
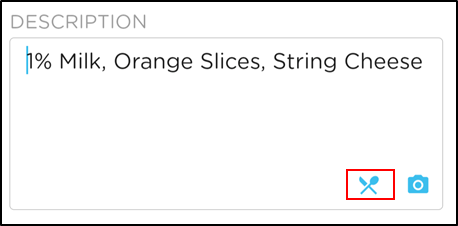
You can choose from a defined list of food items when filling out the description field:
-
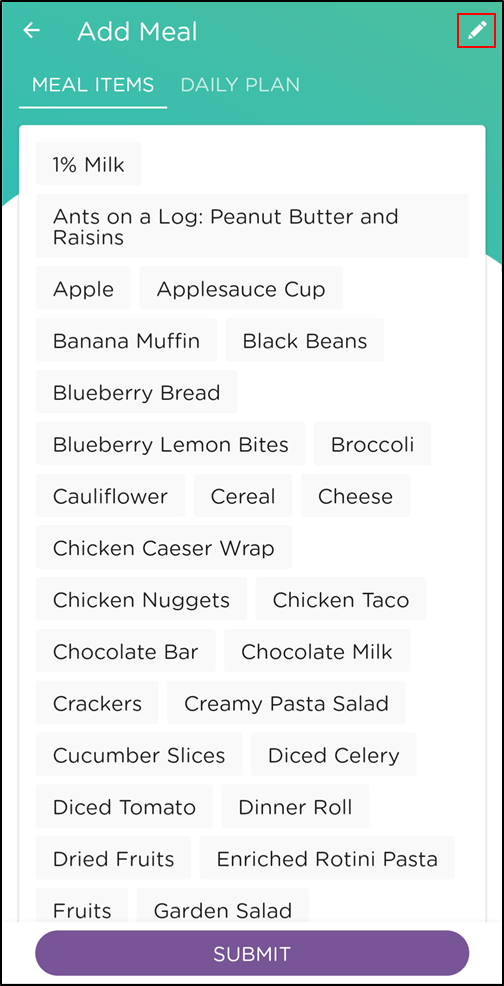
Within the Description field, click on the knife and spoon icon to access the Meal Items.
-
Click the items you are serving, then click Submit to add the selected items to the description of the meal.
-
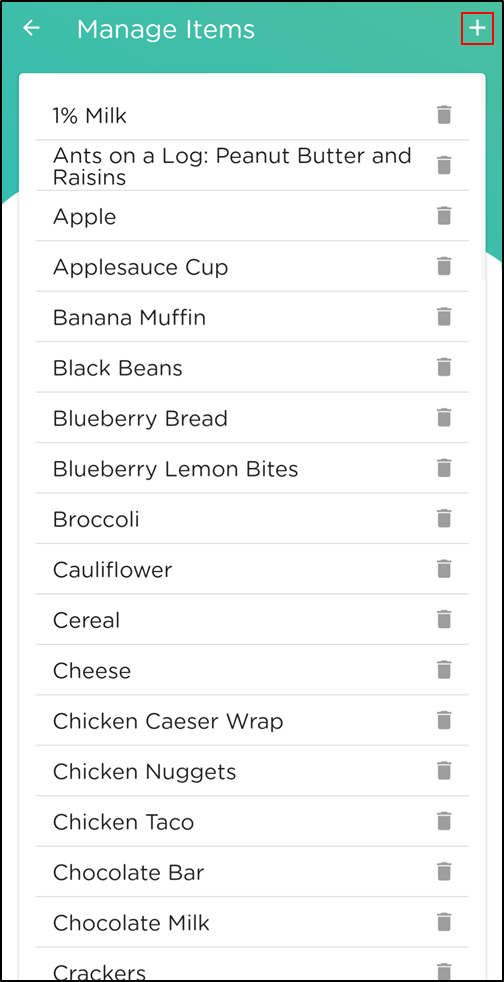
To add new food items, click the pencil icon in top right corner.
-
Then click the + sign on the Manage Items screen.
Choose from Scheduled Meals:
You can also schedule meals using the website version of Procare to quickly select meals when logging the Meal Activities. Once the meals have been scheduled, you can share these meals with parents by selecting the Meal Activity > spoon and knife icon > Daily Plan tab.
Log Meals on the Website
- Go to Parent Connection > Daily Activity
- Click Create Activity.
- Select Meal.
- Enter the Meal Activity details, select the student(s), then click Save.
Update Meals on the Website
-
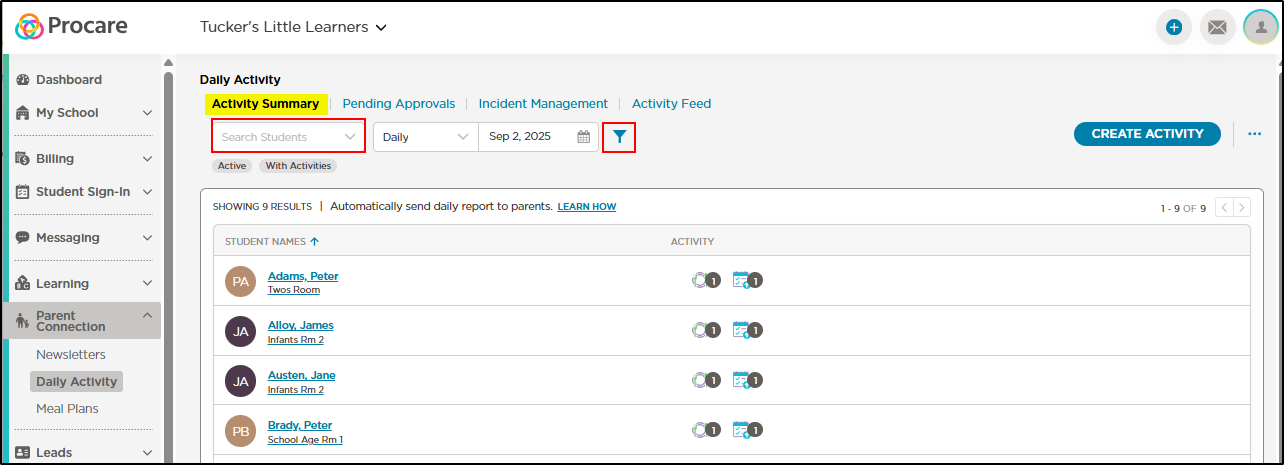
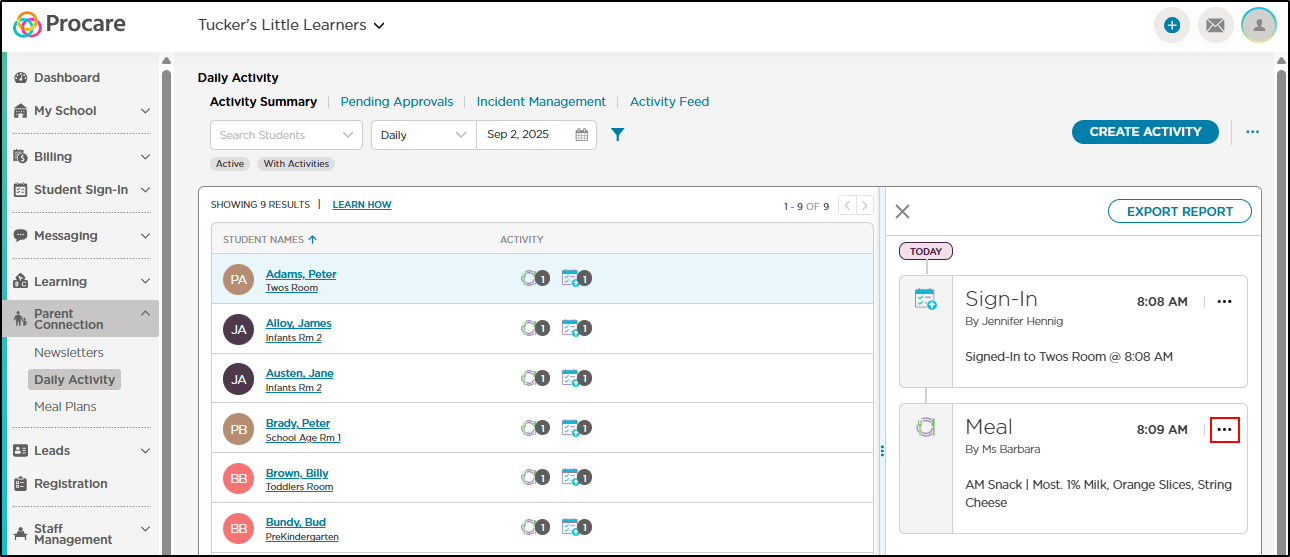
Go to Parent Connection > Daily Activity.
-
On the Activity Summary tab, you can search by student or filter by Meals only.
-
Select the student to open the recorded activities for the day.
-
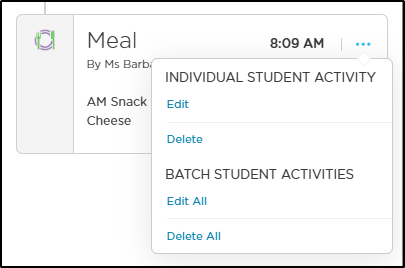
Locate the activity you wish to edit, then click the More Actions icon.
-
Then select Edit. Please Note: If the Meal Activity was created with multiple students, you will have the option to edit the individual student activity or edit the details of the activity for all selected students.
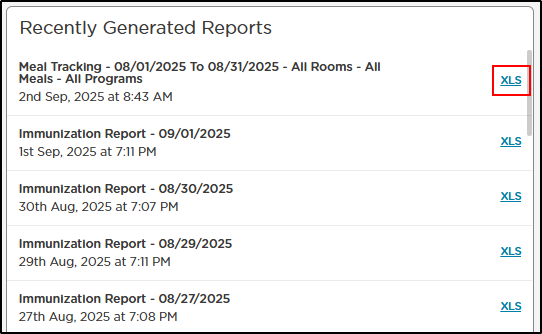
Download the Meal Tracking Report
Click to see a sample of the Meal Tracking report.
-
On the web, click Reports.
-
In the Management section, select Meal Tracking.
-
Complete the Meal Tracking report criteria, then click Generate Report.
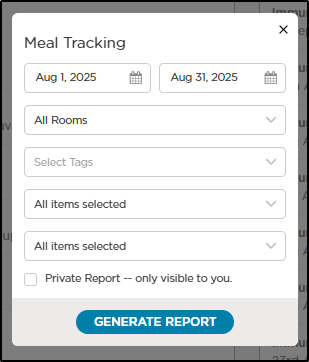
- Choose a date range.
- Select specific rooms or choose All Rooms.
- Use the Tags drop-down to select any tags.
- Filter the report by Meal Type or Food Program.
-
Click XLS from the Recently Generated Reports section to open the report in Excel format.