Navigation Changes
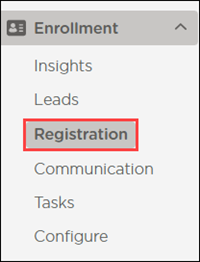
The Leads and Registration sections are now under Enrollment.
Registration is designed to improve the management of your leads funnel, saving you time during the student registration process. Registration allows your center to create multiple registration forms with unique fields and requirements, giving you more freedom to customize registration for different purposes.
In this article you will find:
Overview of form features
How to create a registration form
Support resources
Registration Form Features
Create and manage multiple custom lead registration forms
Target specific lead funnel groups
Manage your lead registration form reply-to email address
Receive daily summarized emails of your newly registered leads
Store a copy of the submitted registration form within the Leads system
Documents submitted through the lead registration system are securely stored against student profile
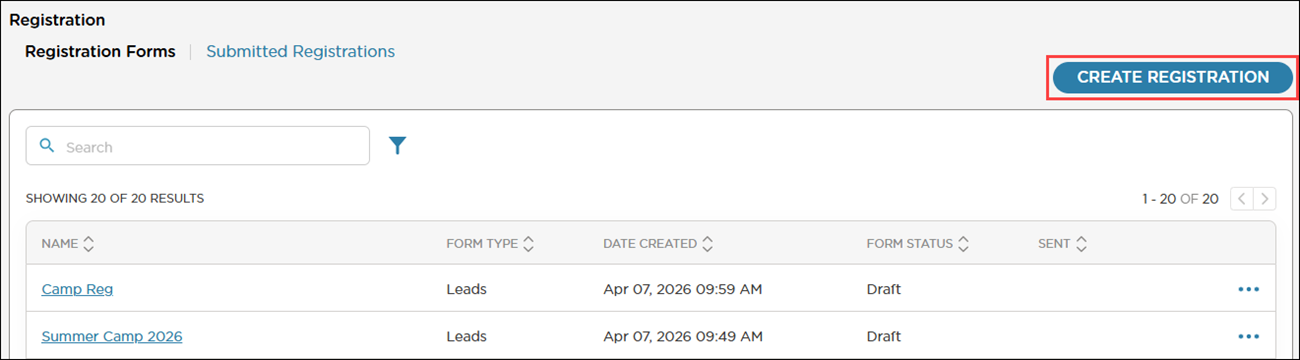
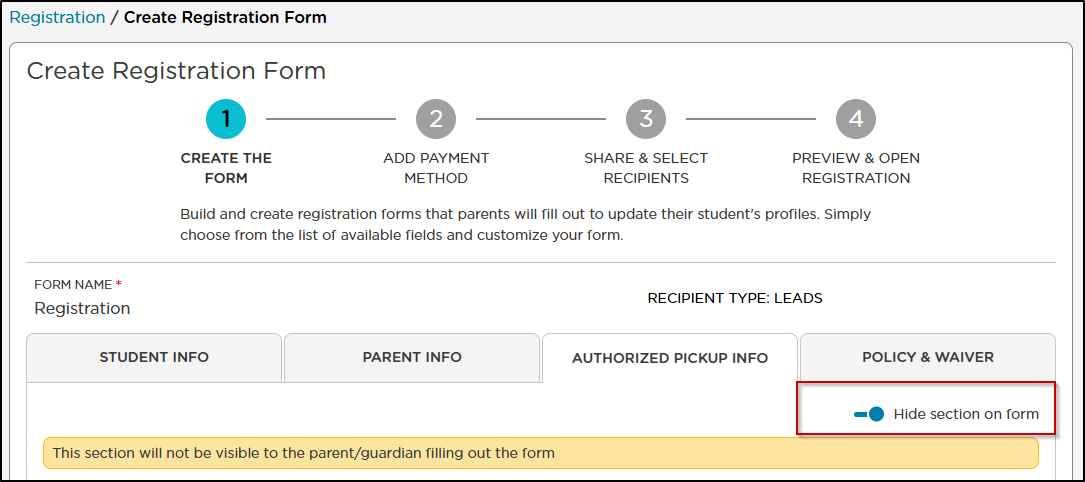
Create a Registration Form
Go to Enrollment > Registration.
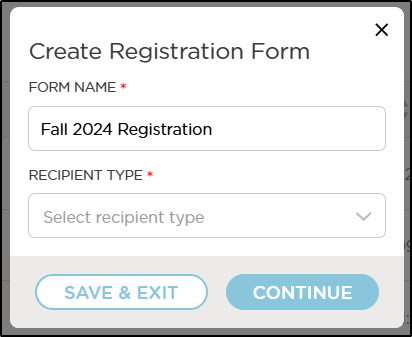
Click Create Registration.
Enter a unique Form Name and select the Recipient Type.
Leads: Select to create the registration form for new students
Active Students: Select to create the registration form for existing students
Click Continue to create the form or click Save & Exit to save the form name and edit at a later time.
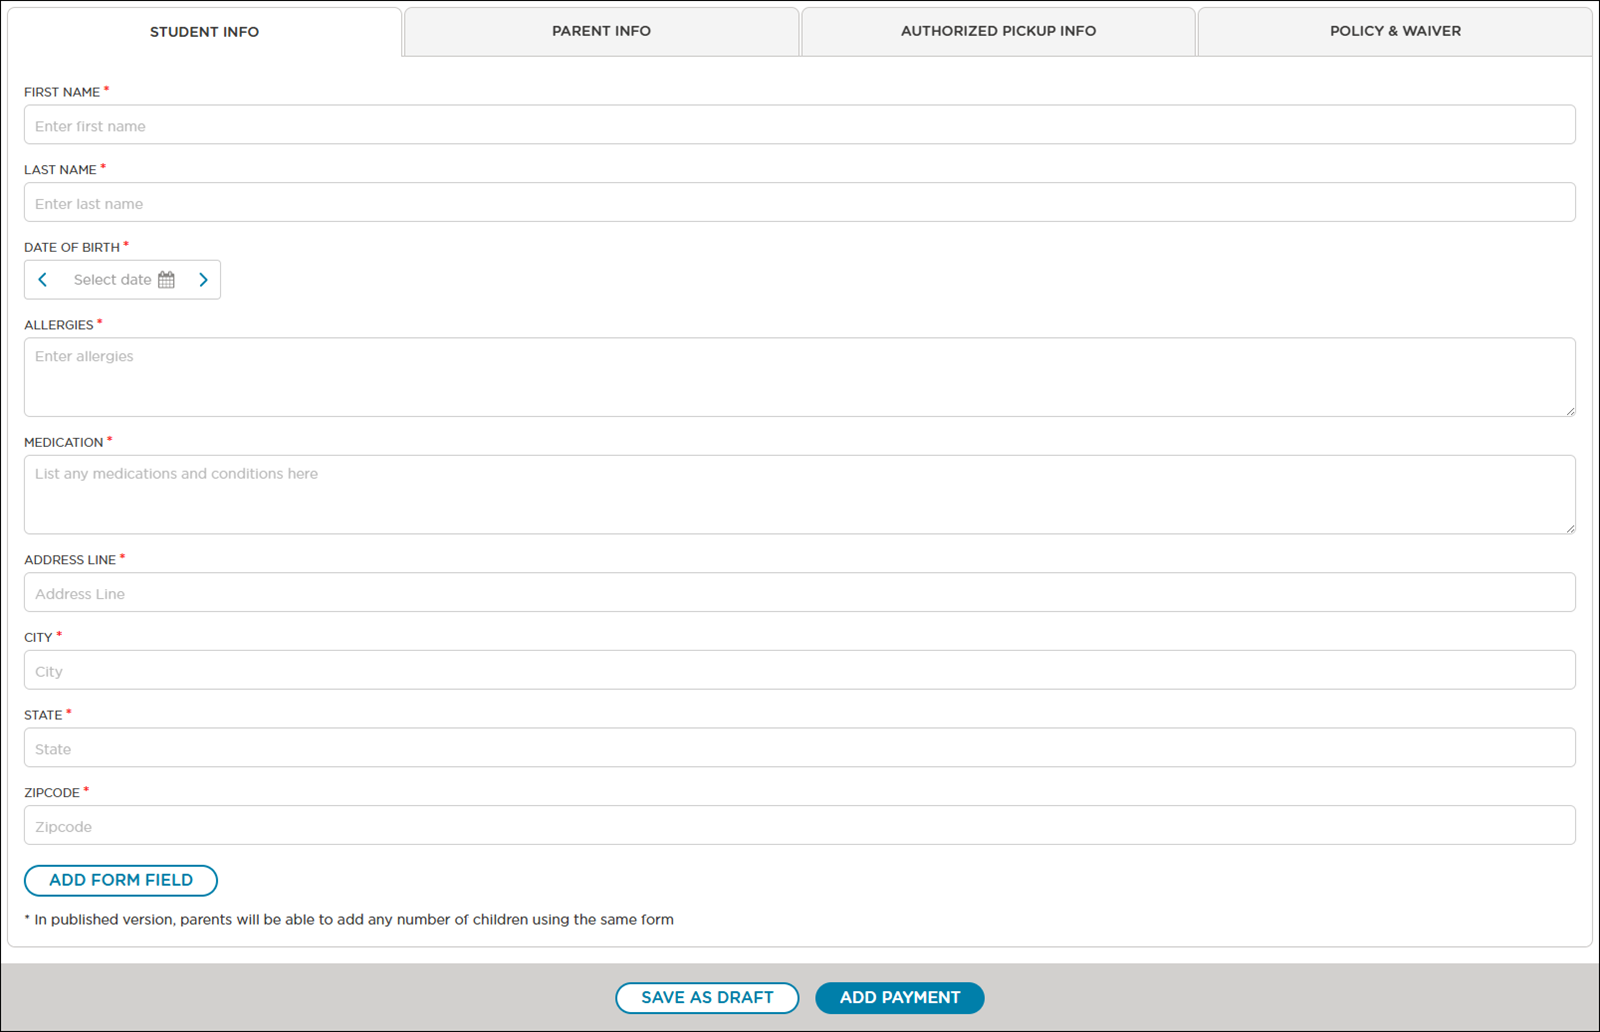
Navigate through each tab to edit or add fields.
Note
Each tab has multiple fields included by default; some are required and can only be edited, while others can be edited or deleted. To edit or delete a field, hover over the field and click Edit
 or Delete
  .
.Student Info
Default Fields
Description
First Name
Last Name
Date of Birth
Allergies
Medication
Address Line
City
State
Zip Code
Required
Edit Only
Note
These fields are pre-determined and cannot be deleted. While you can edit these fields, it is not recommended.
Pre-determined fields are transferred to the student profile upon enrollment of the lead.
Parent Info
Default Fields
Description
First Name
Last Name
Email
Mobile Phone
Required
Edit Only

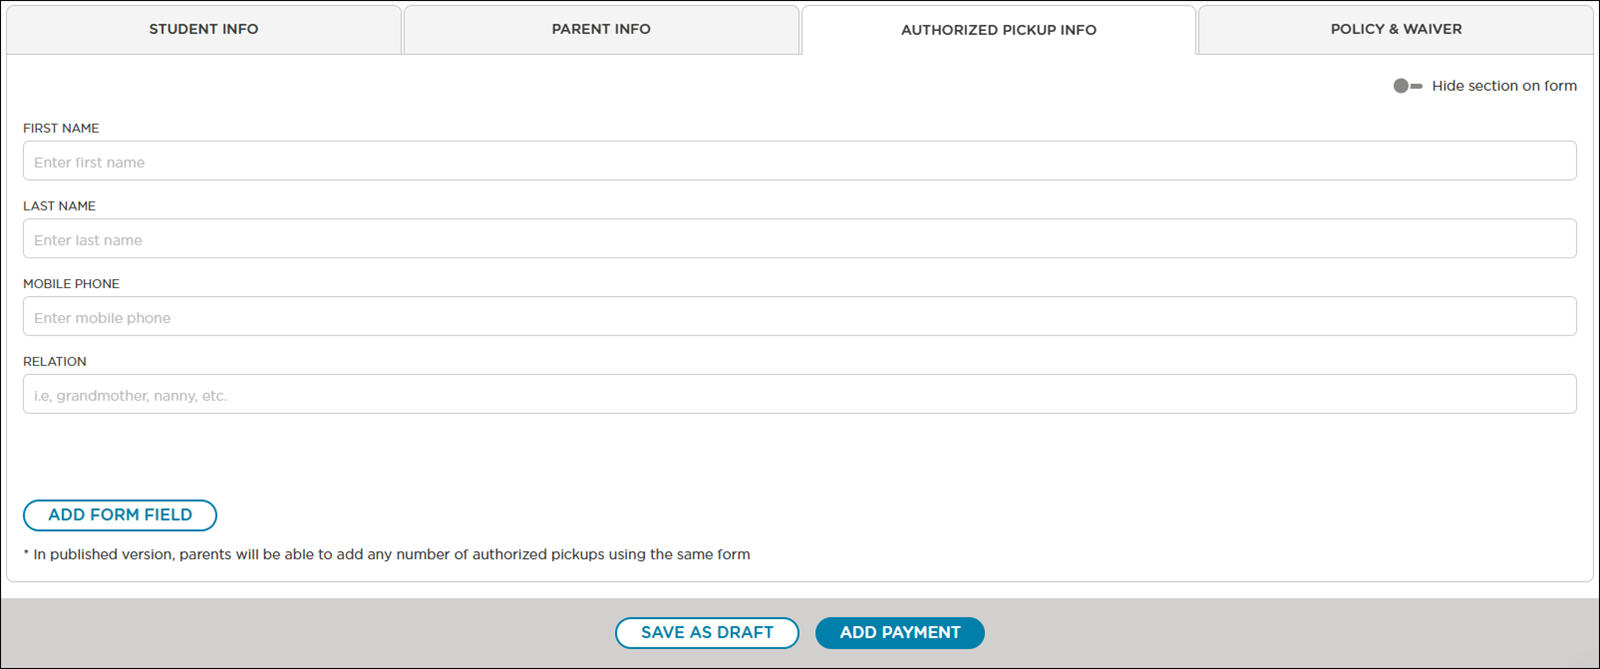
Authorized Pickup Info
Default Fields
Description
First Name
Last Name
Mobile Phone
Edit Only
Relation
Edit or Delete
Policy & Waiver
Default Fields
Description
Liability Waiver
Required
Edit Only
Photo Release
Edit or Delete
Cancellation and Refunds
Edit or Delete
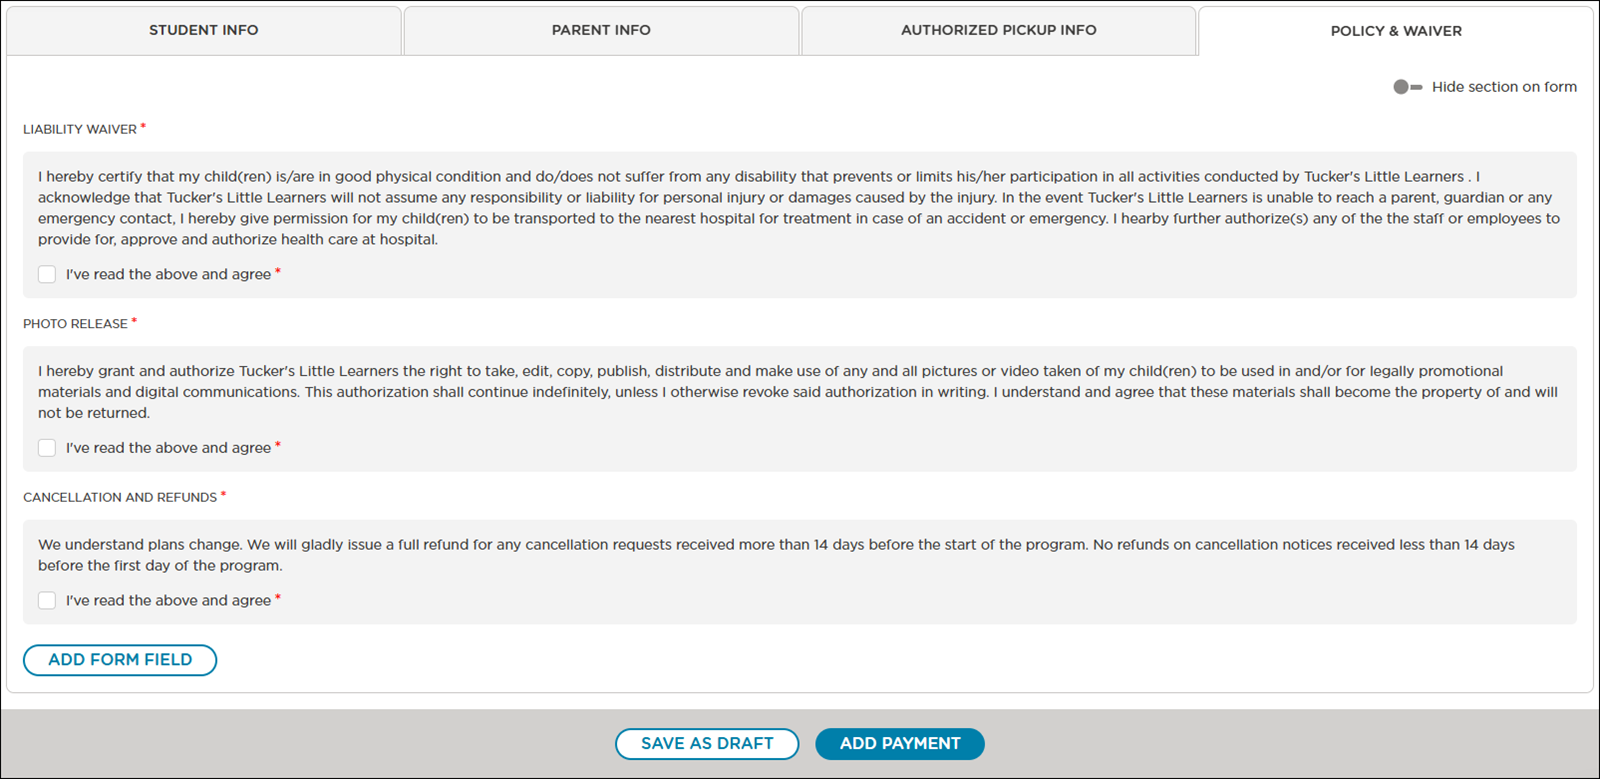
Click Add Form Field on any tab to add additional fields.
Select the type of field to add to the form.
Complete the Registration Form Field popup.
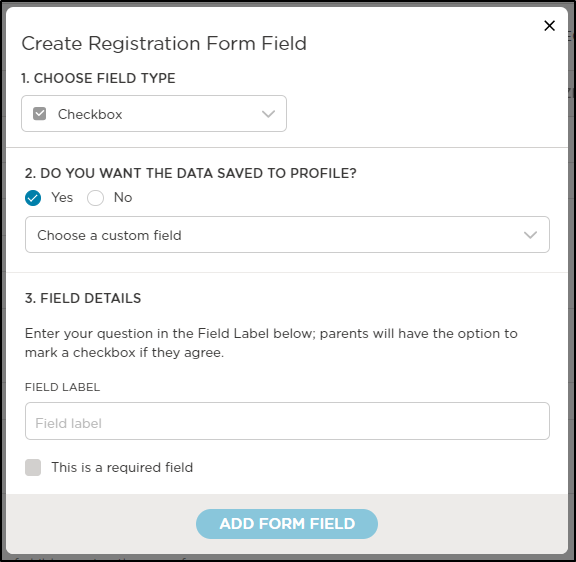
Field
Description
Field Type
Select the type of field to display:
Short Answer
Checkbox
Drop-down
Date Picker
Paragraph
Line Divider
File Upload
Save to Profile
Select Yes to add answers from the registration form to the lead profile. Select a custom field or create a new custom field from the drop-down. This selection is where the data will display on the lead's profile.
Select No if you do not want the data from the registration form to save to the lead's profile. The data from the registration form will still be available via PDF.
Field Details
This section displays different options based on the field type selected. Some options include making a field required, allowing multiple lines, adding a confirmation checkbox, etc.
Click Add Form Field.
Once the form fields are complete, click Add Payment at the bottom of the form to collect registration fees. See: Receive Payments for Enrollment Fees for more information.
Do one of the following:
Click Save as Draft to save the form and continue editing it later
Click Share when you are ready to share the registration form with families. See: Share your Registration Form for more information.
Form Status
Status | Description |
|---|---|
Open | The registration link is open and families can fill out the form. |
Closed | The registration form is currently closed and not available at the moment. |
Dynamic Form Sections
The option to hide a section on the registration form is available for the Authorized Pickup Info and Policy & Waiver tabs. This allows you to remove these sections from the form so they will not be visible to the registrant during the registration process, simplifying the form and focusing on essential information.
Pre-authorized pickup information will be retained if a profile is updated using a form that has Authorized Pickup Info hidden.
Support Resources
This video demonstrates how to build and customize registration forms and share forms with existing leads in your system and prospective students.
Note
Once a form has been submitted, the student will display in Leads. You can view our help center collection on Leads here. If the system identifies a submitted registration as a potential duplicate in Leads, you can review and manage the lead in the Submitted Registrations section.
This PDF contains a step-by-step guide on creating and sharing multiple registration forms.