Staff and authorized guardians/family members can message each other directly through the SchoolCare Works Provider Portal and Connect (Parent) Portal. This article provides a step-by-step guide for setting up Messaging for your staff and families.
Set Up Messaging for Staff
To add Messaging for staff users, the correct permissions must be set up for each role. On the Setup Roles screen, locate Activity ID 1917 (Messaging - Provider) and update to ‘All Permissions’ for each role that should have access to Messaging.
See: Setting Up or Editing Roles for more information on accessing and changing permissions.
The following roles will have access by default:
Site Administrator (Full Access)
Super User
Important: The Messaging option is displayed under the Connect menu. To provide users access to Messaging but not the Connect menu, change Activity ID 1917 to All Permissions, and Activity ID 23 should be set to No Permission.

Overriding Roles at the Center Level
Permissions can be set up at the Business Level or Center Level. If permissions are set up at the Business Level, you can customize these permissions at the center level, if needed.
Once logged into the Center, click Staff > Admins.
Click Actions, then select Setup Role Overrides.
Search and select the role in the Role drop-down field.
Select Messaging in the Activity Category field.
Choose All Permissions for ‘Activity ID 1917 Messaging - Provider’.
Users for the selected role will now have access to Messaging, and a Messaging icon will display on the right side of the top navigation bar.
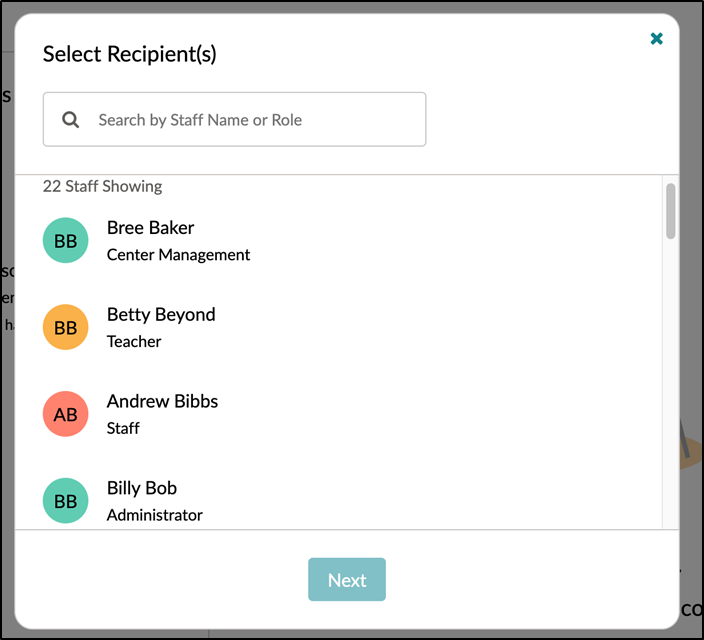
Create Job Categories
Setting up Job Categories is not required, but it is recommended. Job Categories are displayed for parents next to the staff member’s name.
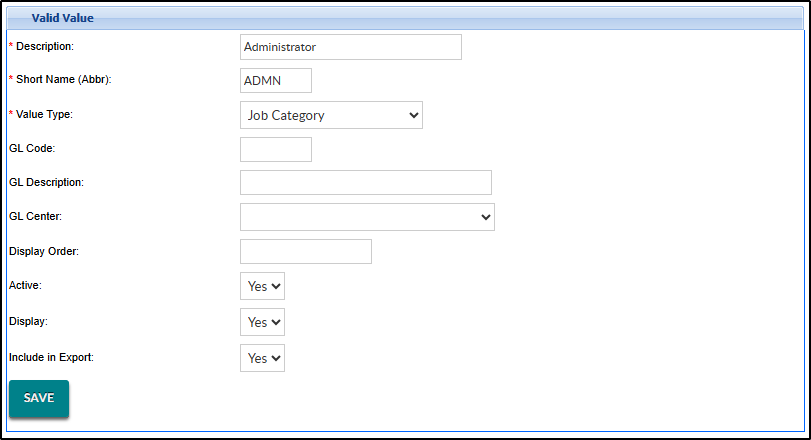
To set up job categories, you must create Valid Values for each. See: Valid Values for instructions on how to create new Valid Values. When creating the Valid Values, use the following settings:
Add a Description (i.e., Administrator, Teacher, etc.) and a Short Name (abbreviation).
Select Job Category as the Value Type.
Setting Up Staff Profiles
For staff members to use Messaging, they must have a username and password set up. Navigate to Staff > Staff List and follow the instructions below:
On the Staff List screen, locate the staff member and click the edit icon next to their name.
If the UserID field is blank, add a username, then click Update.
Enter a temporary password in the Password field.
Re-enter the password in the Password Confirm field, then click Update.
Locate the Primary Job Category and select an option. Please Note: This is recommended, but not required. See above for more information.
Click Save.
Continue this process for each staff member that should have access to Messaging.
Set Up Messaging for Parent Portal Users
To add Messaging for parents/guardians, permissions must be added for the Family Portal (Not Allowed) role. On the Setup Roles screen, locate Activity ID 1918 (Messaging - Connect) and update it to ‘All Permissions’. These permissions can be set from the Business Level or the Center Level.
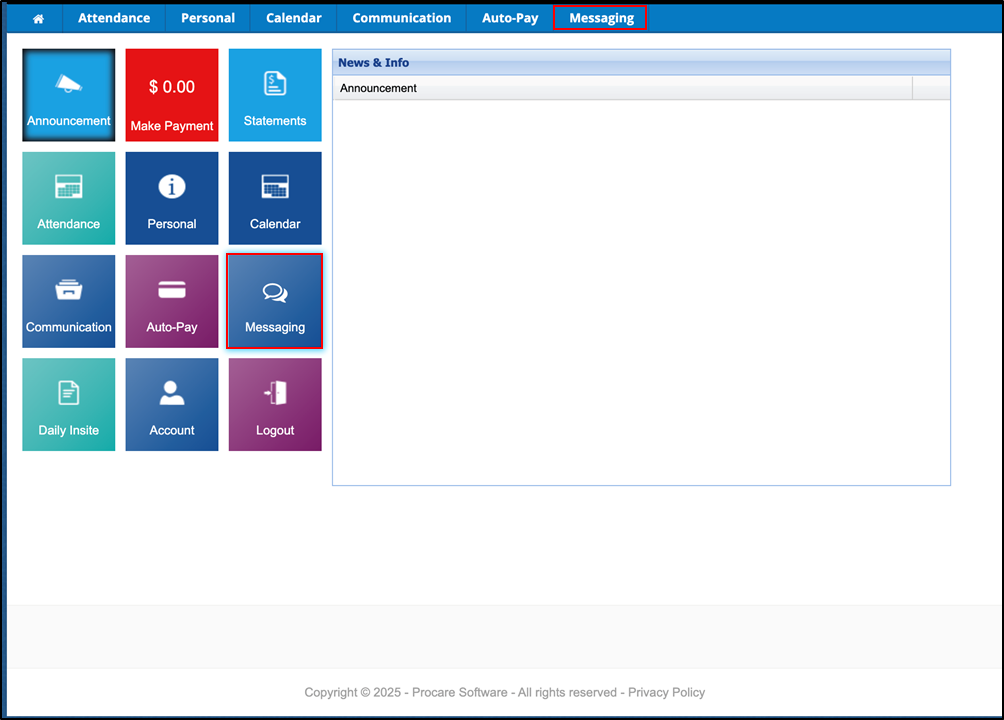
Adding these permissions will add ‘Messaging’ as a menu item across the top menu bar and a tile on the home screen.
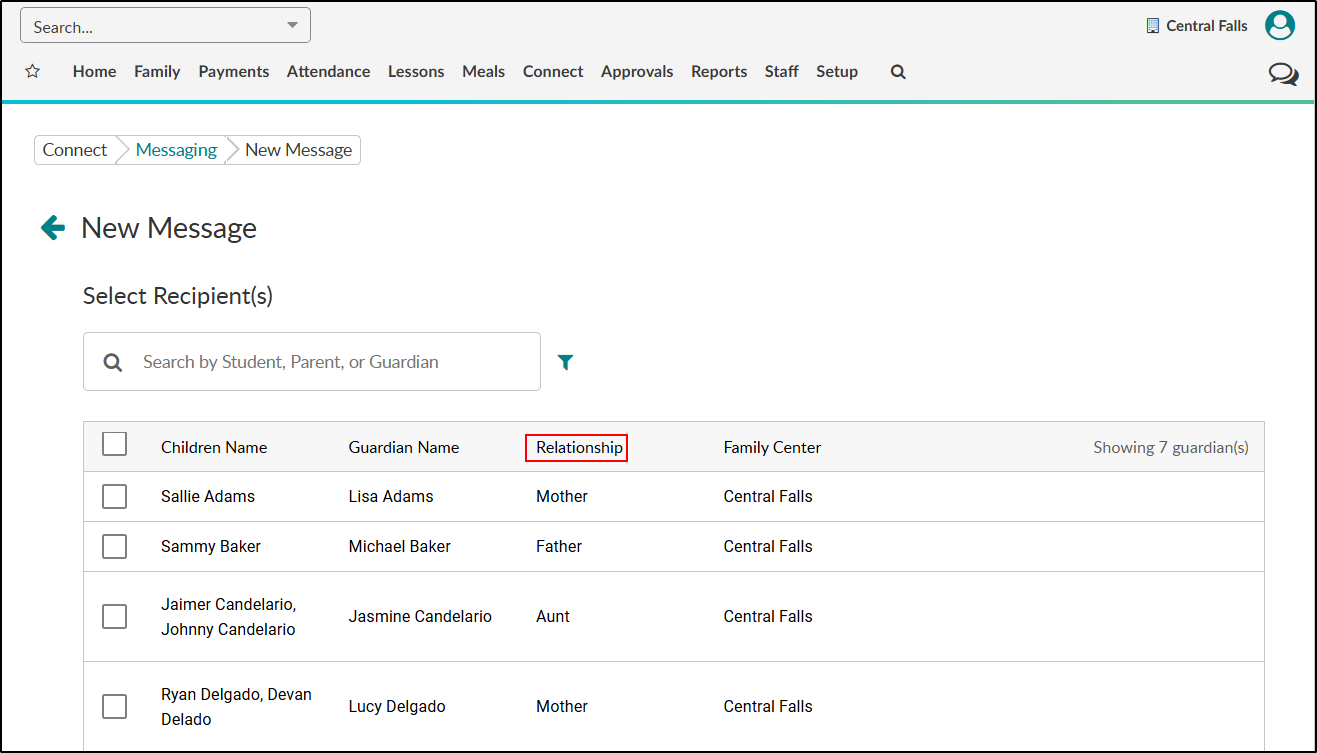
Setting Up Relationships
Setting up Relationships is not required, but it is recommended. By specifying each person’s connection to the child, your staff can quickly see their relationship when communicating.
To set up Relationships:
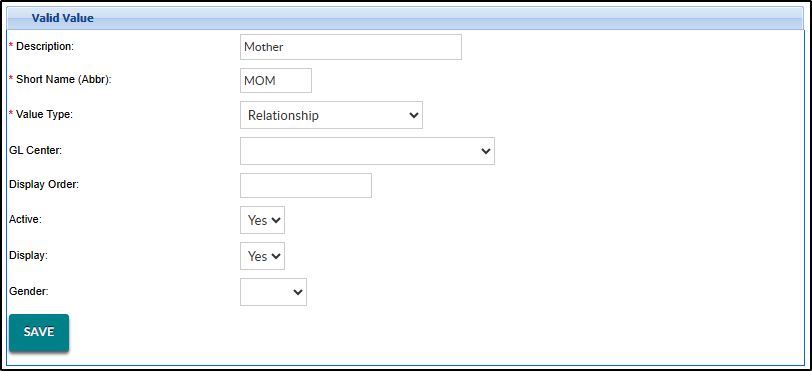
Navigate to Setup > System Config.
Click Valid Values.
Add the Description (relationship, i.e., Mother, Aunt, Babysitter, etc.) and Short Name (abbreviation).
Select Relationship as the Value Type.
Click Save.
Setting Up Guardians
Once permissions have been set and relationships have been created, you must ensure each guardian has access to the parent portal so they can utilize Messaging.
Locate the family record for the guardian(s) you want to update.
Click the Parents tab, then select the guardian to edit.
If the UserID field is blank, click Add Portal User.

Add a username, then click Save.
Enter a temporary password in the Password field.
Re-enter the password in the Confirm Password field, then click Update.
Locate the Parent/Guardian - Relationship field and select an option.
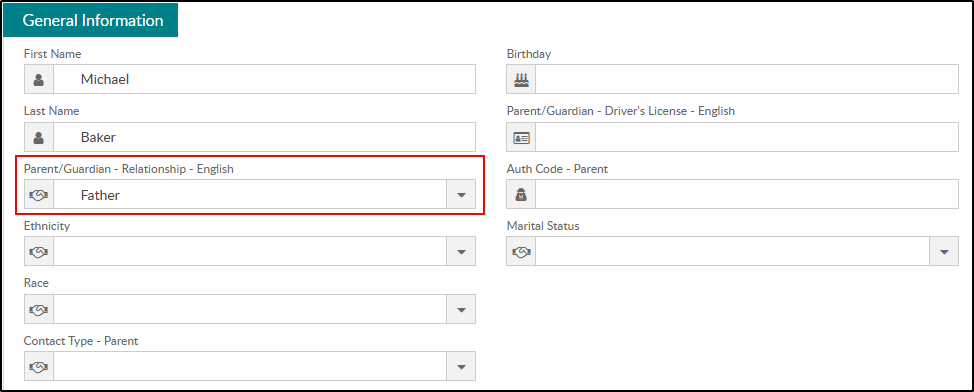
Click Save.