Purpose
The Keyless Entry System provides secure access to your child care facility by allowing entry only to authorized staff and families. See: Keyless Entry Features
Hardware Installation & Wiring
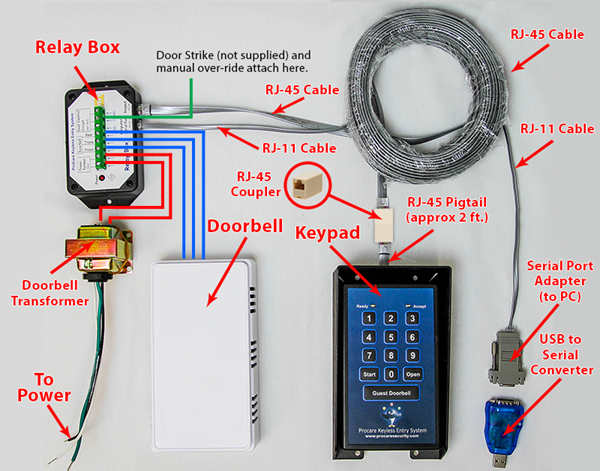
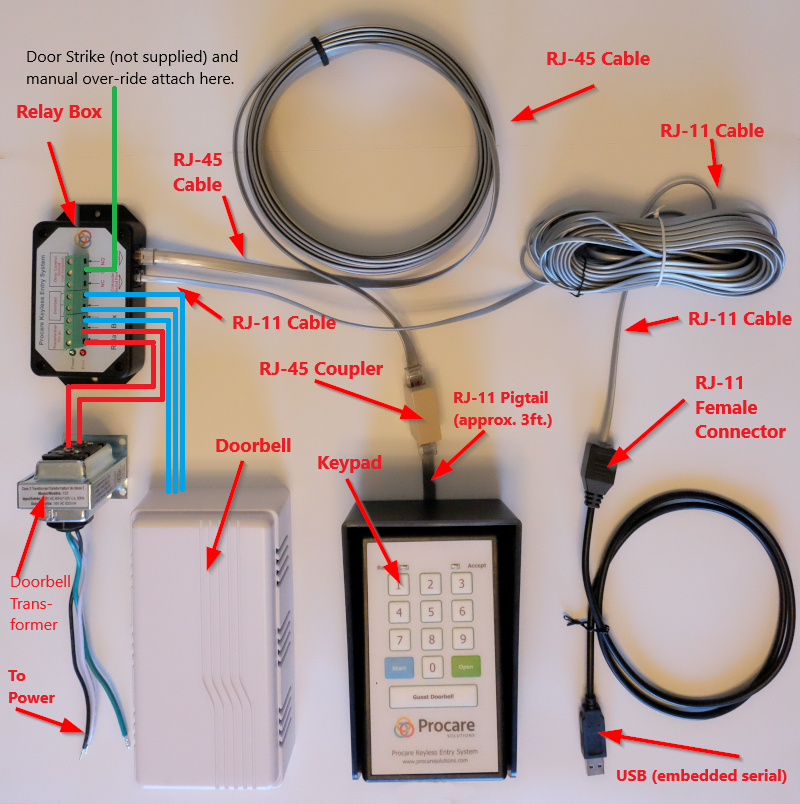
The Keyless Entry hardware is connected to your electrically operated door (not supplied) and typically should be installed by a local electrician or door security company. See Instructions and Wiring Diagram. Note: In a small number of cases it may be necessary to add an Additional Relay.
KES v1

KES v2

Software Overview
The Keyless Entry includes software allowing you to manage and transmit ID codes from Procare to the keypad, set up additional codes, restrict codes, and monitor codes as they are used to enter the building. Follow these basic steps:
- Install Keyless Entry Software
- Enable Software and Set Options
- Assign Codes to People
- Transmit Codes, Additional Codes, Restrict Codes
- Monitor Codes (optional)
Parts List
Included:
(1) keypad with attached RJ-45 pigtail
(1) RJ-45 coupler
(1) roll of RJ-45 flat cable (approx. 30′) or use your own CAT-5 cable
(1) relay box
(1) 2-chime doorbell
(1) doorbell transformer
(2) manual open buttons*
(1) roll of 4-wire RJ-11 phone cable (approx. 100′)
(1) RJ-11 to serial adapter
(1) serial to USB adapter
*Note: Wire one manual open button to the door control circuit. This allows a staff person inside to manually ‘buzz’ the door open so people without codes may enter the building. The second manual open is a spare.
Not Included: door strike, door strike power supply, disable key switch and their associated wiring. Obtain through a local security company or door supplier, etc.