Responding to payment errors is easier than ever with Linked Refunds. Refund payments directly from a payment record while maintaining a clear audit trail that links the original payment to its refund. All refund activity is automatically recorded in the account ledger for accurate financial tracking.
Supported Refundable Payment Types
Linked refunds are available for the following payment types:
POS Payments
ACH Payments
Batch Payments
MyProcare Payments
Important Rules and Limitations
Please review the following before issuing a refund:
Only full refunds are supported using this workflow. Partial refunds are not allowed.
To issue a partial refund, use the POS refund flow.
Payments must be fully processed before they can be refunded.
Refunds must be initiated within 60 days of the original payment.
Linked refunds must be initiated from the original payment record.
Refunds are returned to the original payment method (Card or ACH).
Payments made through the Procare Mobile App cannot be refunded using the linked refund workflow.
If needed, issue a manual refund via POS.
Linked refunds show the relationship between the payment and refund, but do not display a connection to the original charge.
Refunds issued through the TE POS workflow are not linked to the original payment.
Users will have access to Linked Refunds if they have permissions enabled for Refund Account Ledger Entries under 20.020.60.55 in the user group limits.
ACH Refunds
ACH Payments typically take 3-4 business days to settle. There is a small window during which a refund can be processed before the ACH funds are settled.
To Refund a Payment
Navigate to the Account
From Family Data & Accounting, locate and select the appropriate Account.
Select the Account Ledger icon to view payment history for the account.
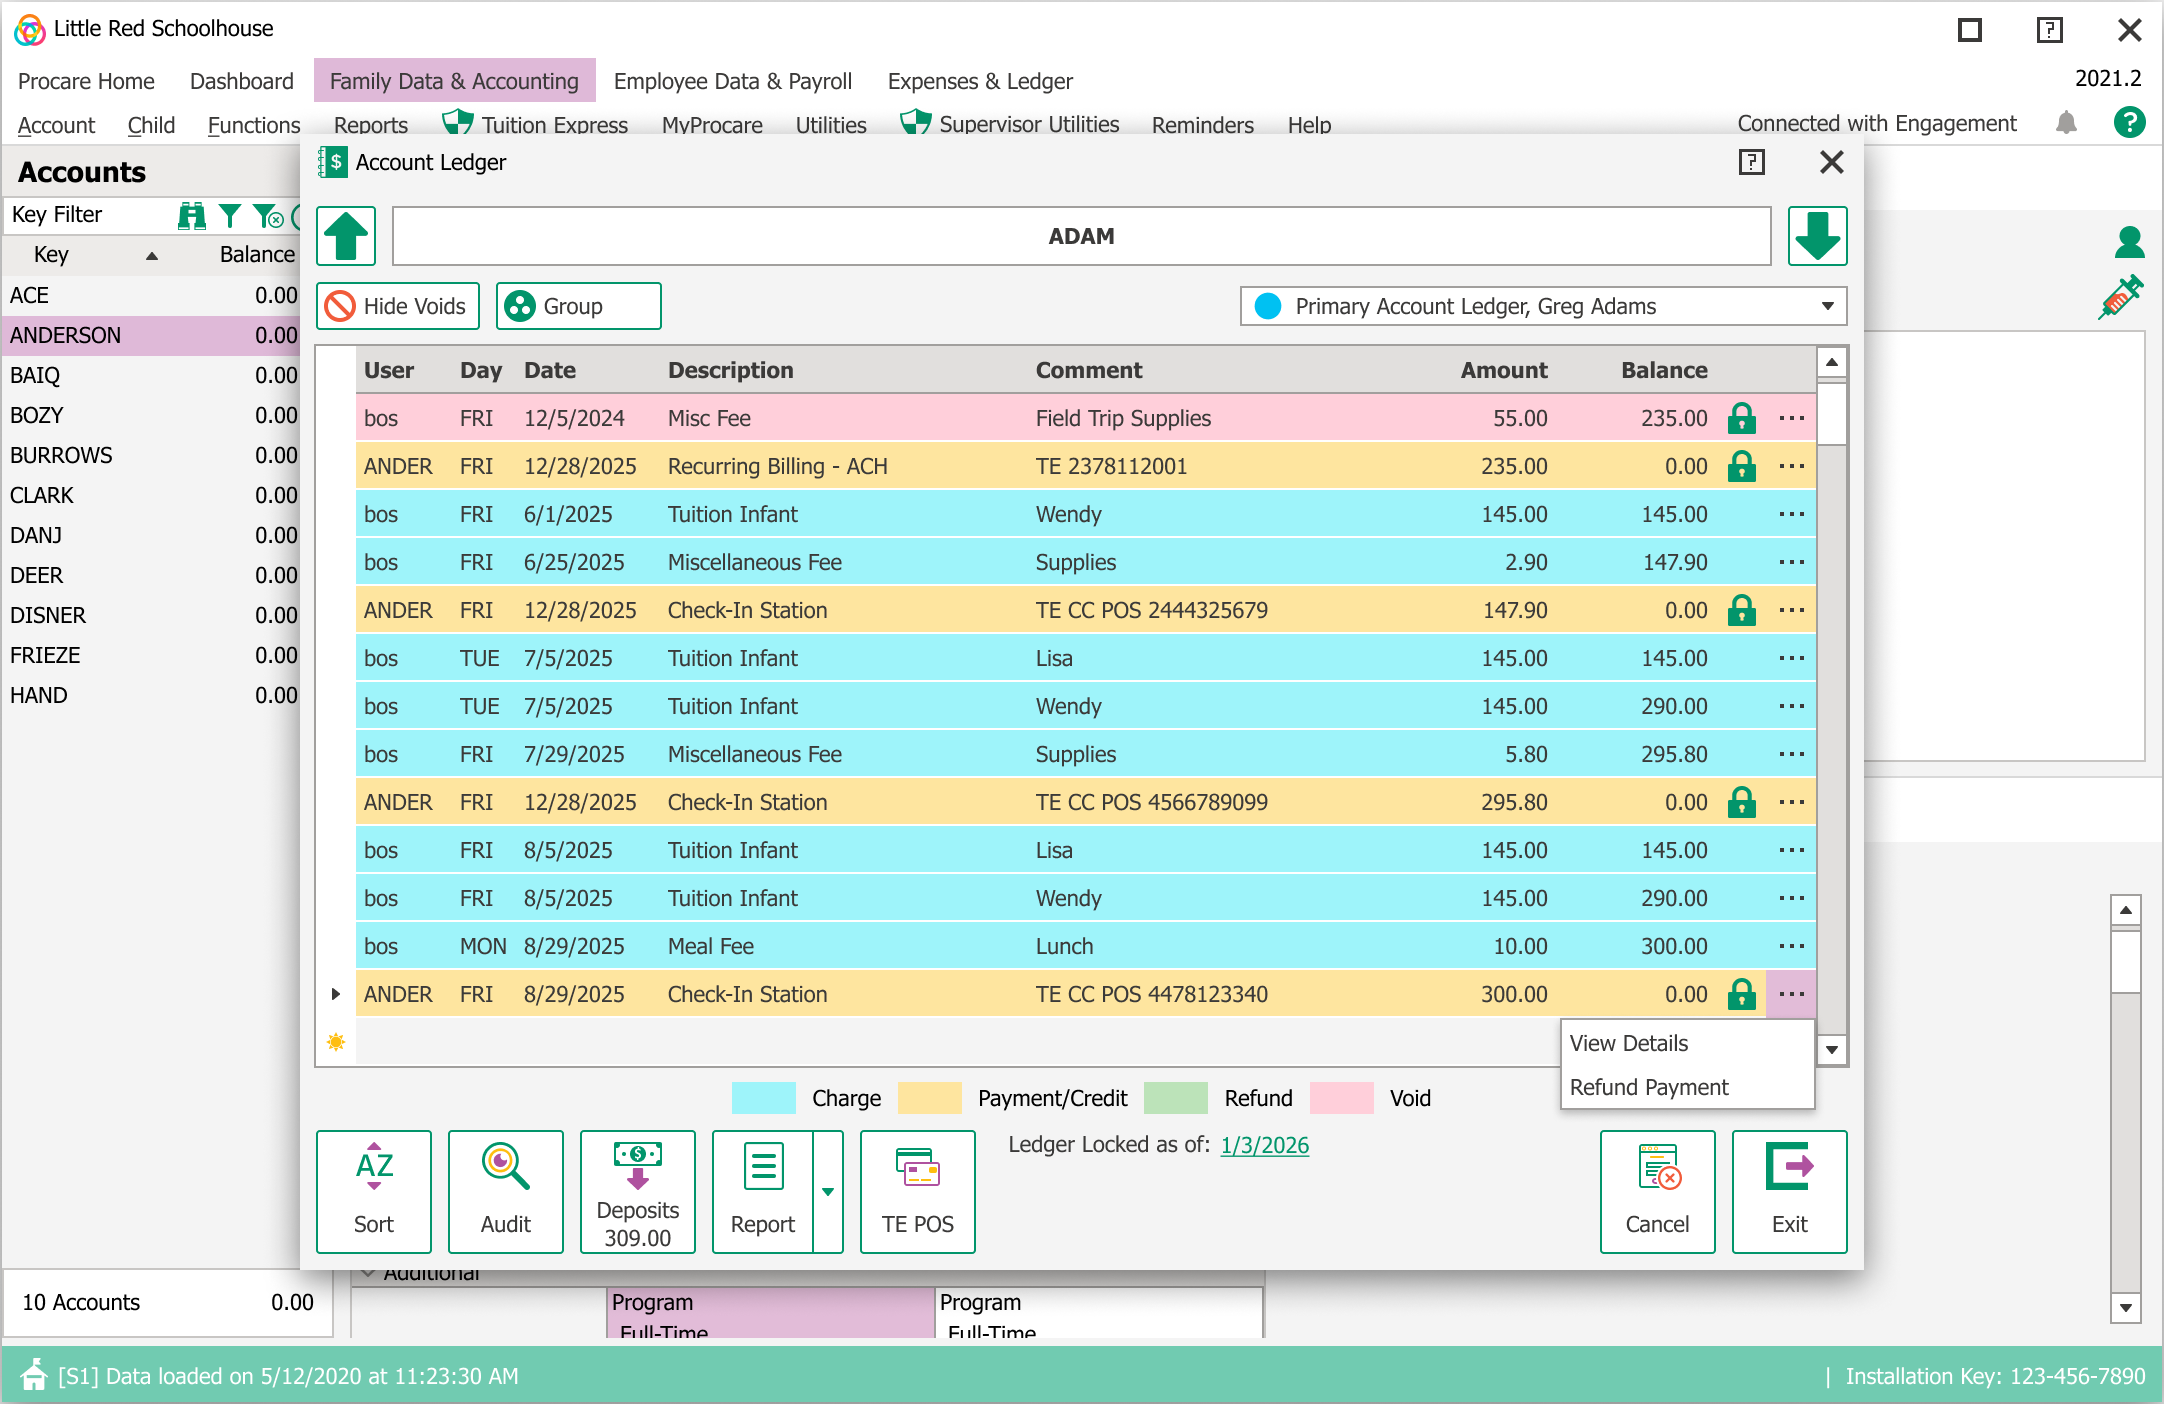
Locate the Payment
In the Account Ledger, locate the payment that needs to be refunded.
Select the three‑dot (⋮) menu next to the payment.
Choose one of the following:
View Details (to review the payment before proceeding), or
Refund Payment (to begin the refund process)
Void (to void the payment if applicable)
Initiate the Refund
Select Refund Payment.
Enter a Refund Reason.
This field is required and must be completed to proceed.
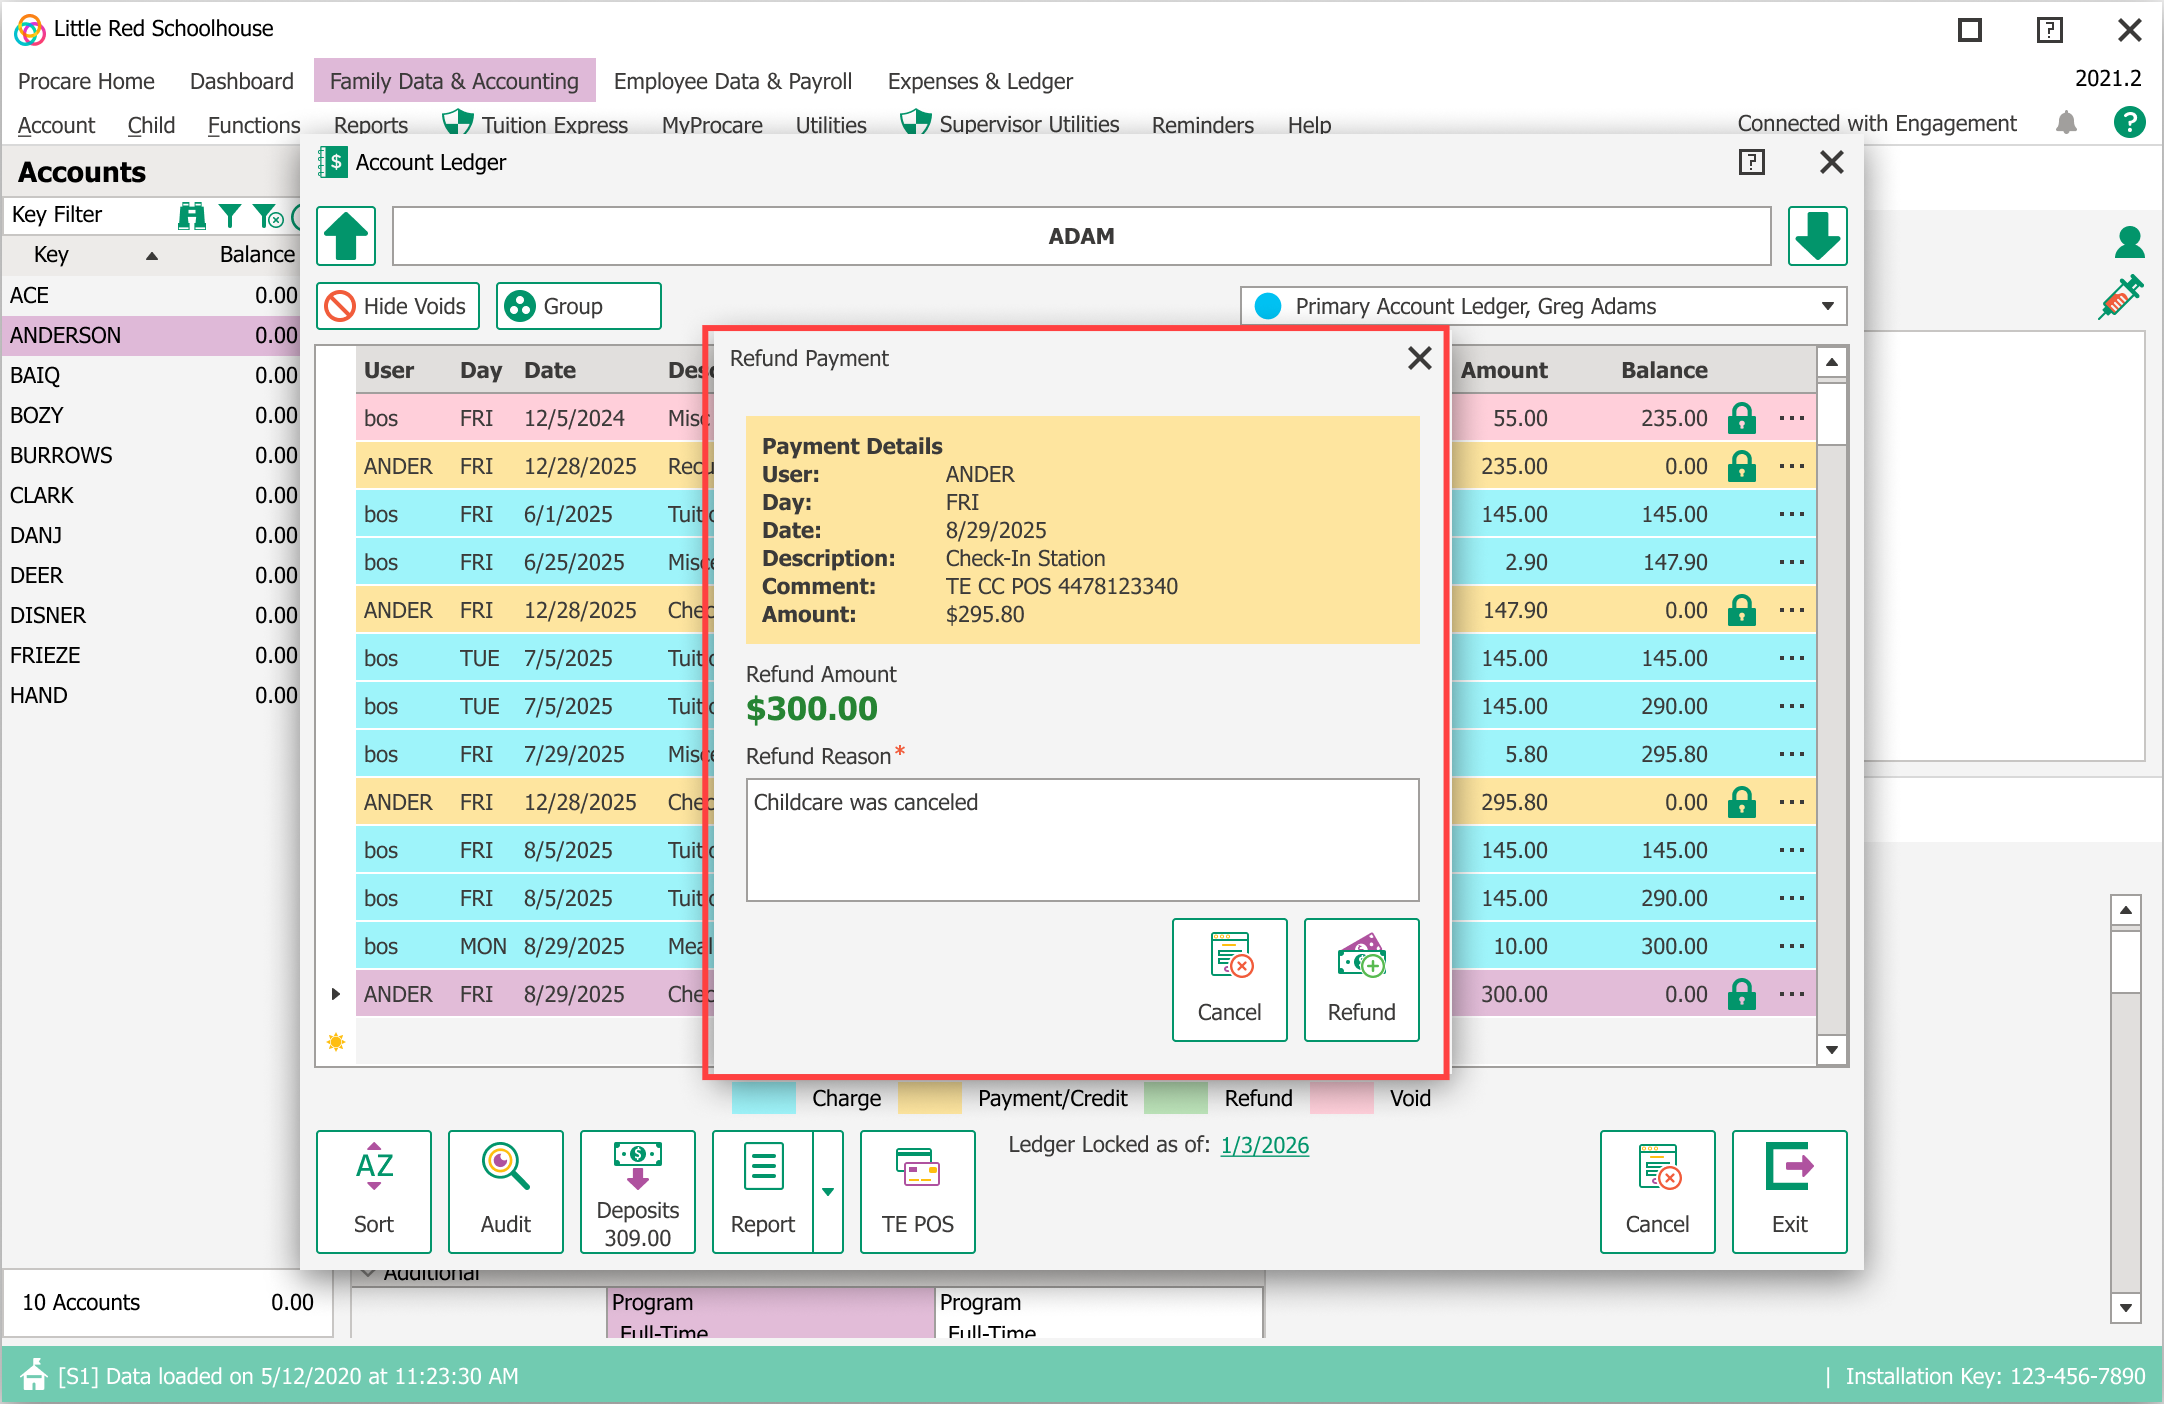
Select Refund.
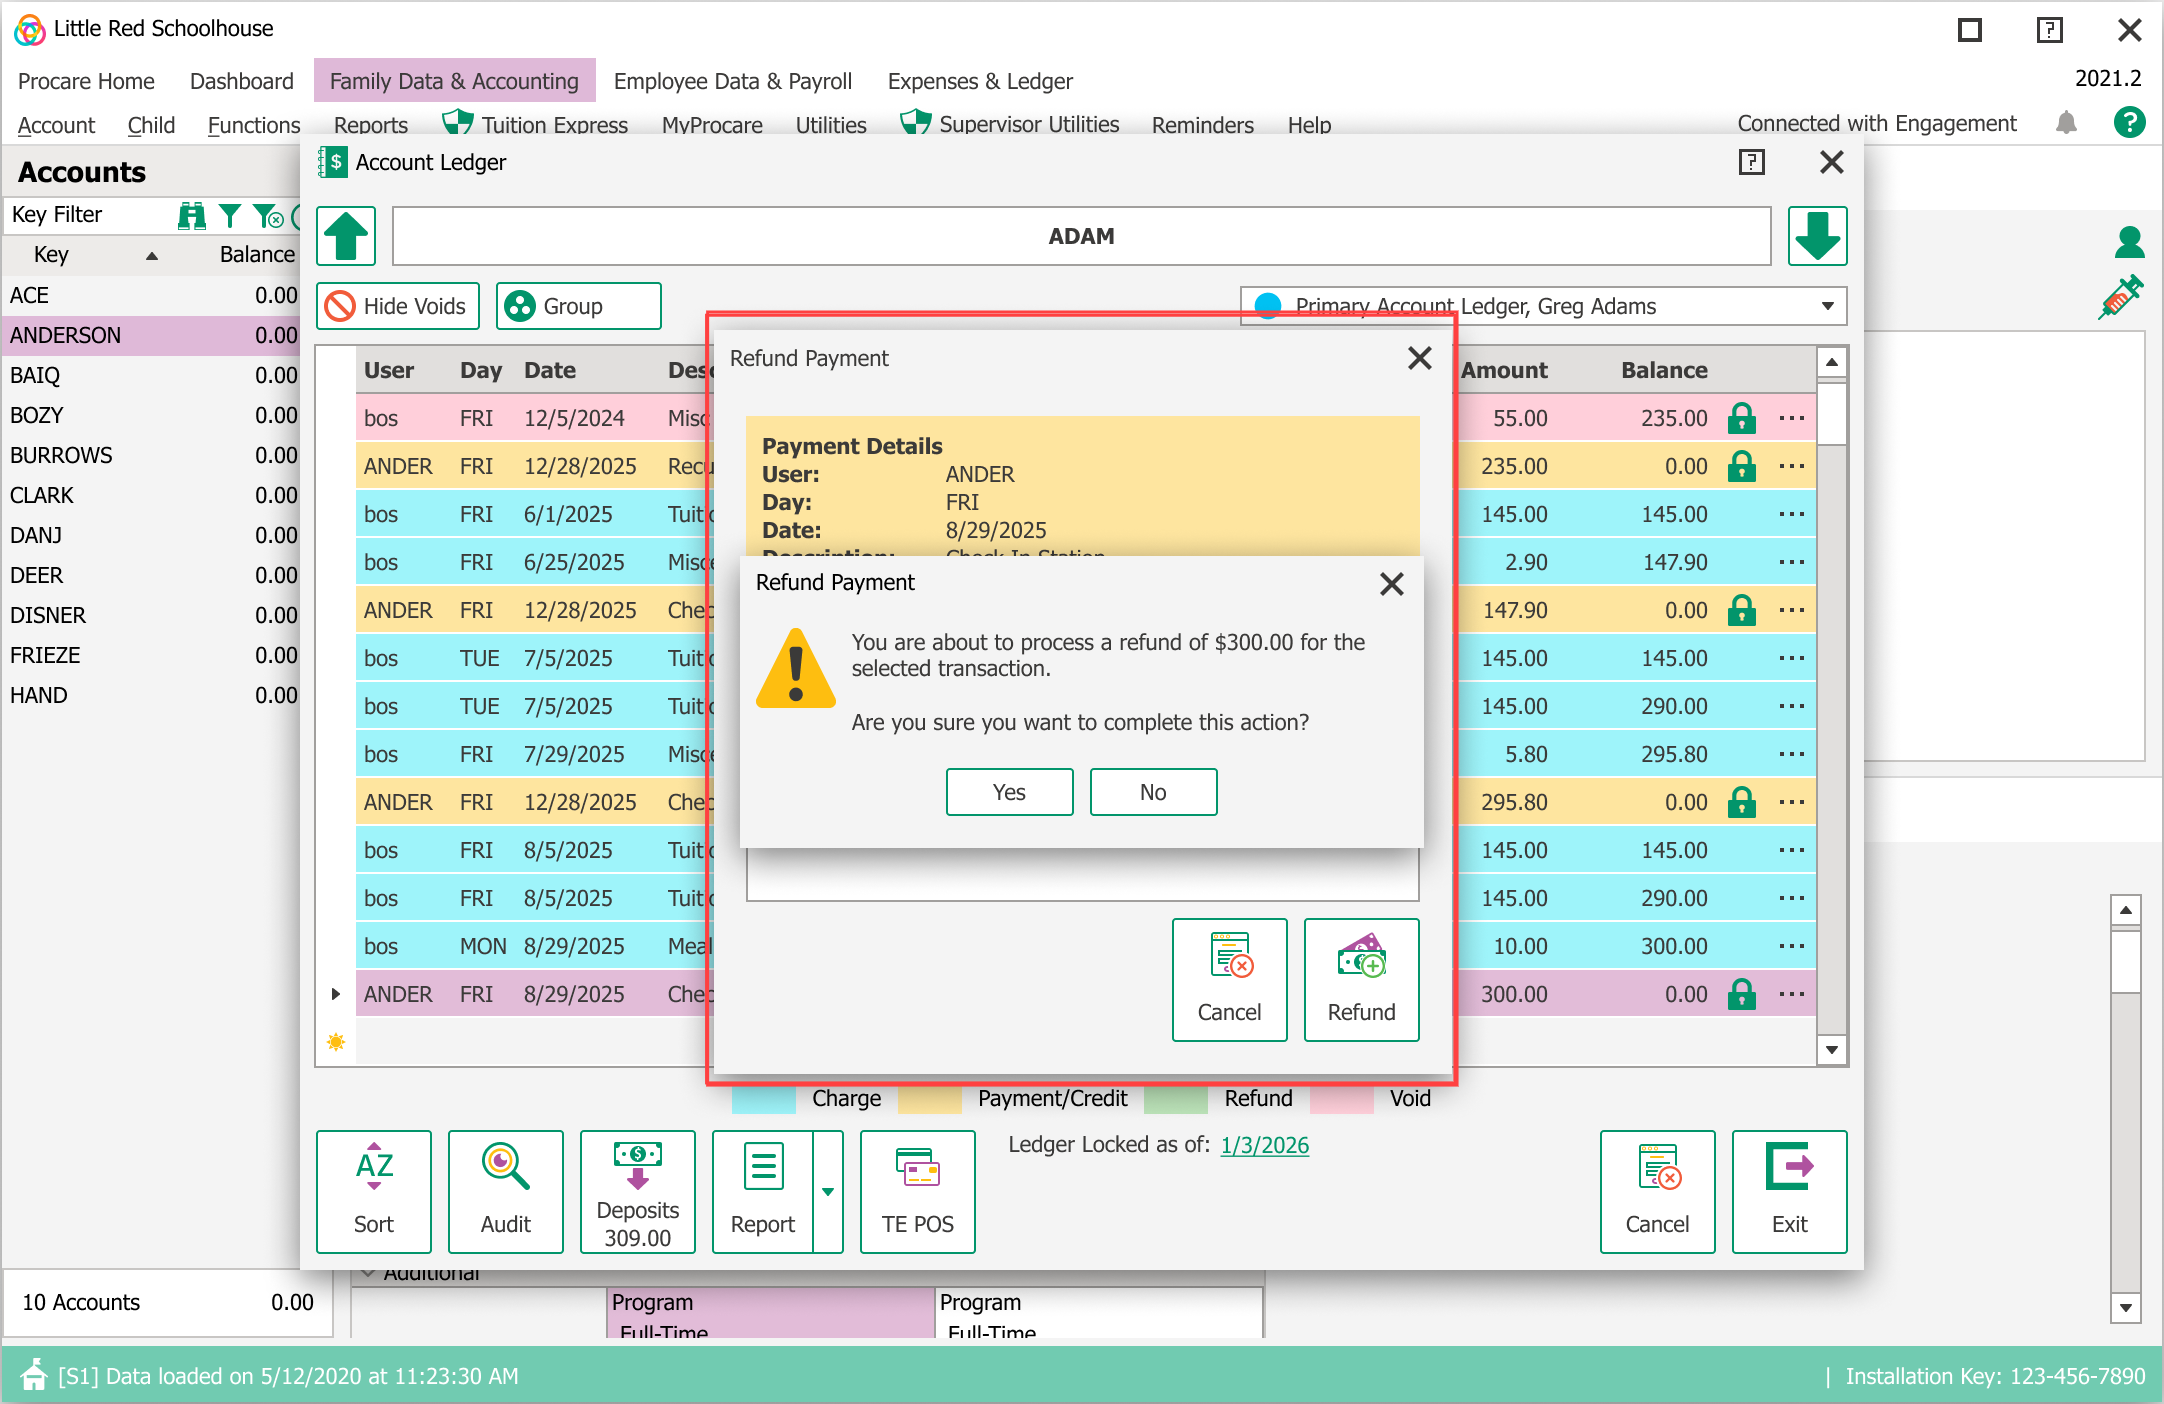
Review the confirmation message and select Confirm Action to complete the refund.
The refund is processed back to the original payment method.
The system automatically updates the account ledger, ensuring accurate and complete financial records. The date the refund was initiated is indicated on the ledger.

Payment Transaction History
Select View Details to see a complete history of all charges, payments, and refunds associated with that transaction.
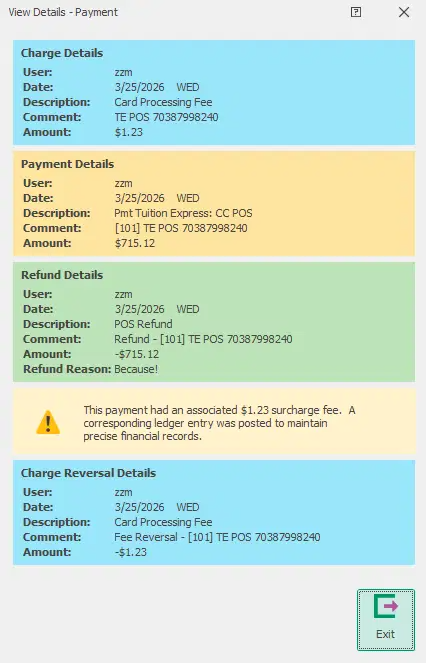
Surcharge Behavior
If a payment included a surcharge, this is clearly identified in both the Payment Transaction History and the account ledger. Instead of appearing in green as a refund, the surcharge is shown in blue as a charge reversal, indicating that the surcharge amount was reversed rather than refunded.
| Troubleshooting Guide |

Why can’t Mobile App payments be refunded using this process?
Payments made through the Procare Mobile App are not supported by the linked refund workflow due to how those payments are processed. While the three‑dot menu may appear, the Refund Payment option will be unavailable and the following error message is shown:
“Unable to refund this payment. You will need to create a manual refund in order to refund this payment.”
Why don’t I see the “Refund Payment” option?
This may happen if:
The payment is more than 60 days old
The payment was made through the Procare Mobile App
You do not have the required user permissions
Do I need special permissions to issue refunds?
Yes. The ability to issue refunds depends on your assigned role and permissions.