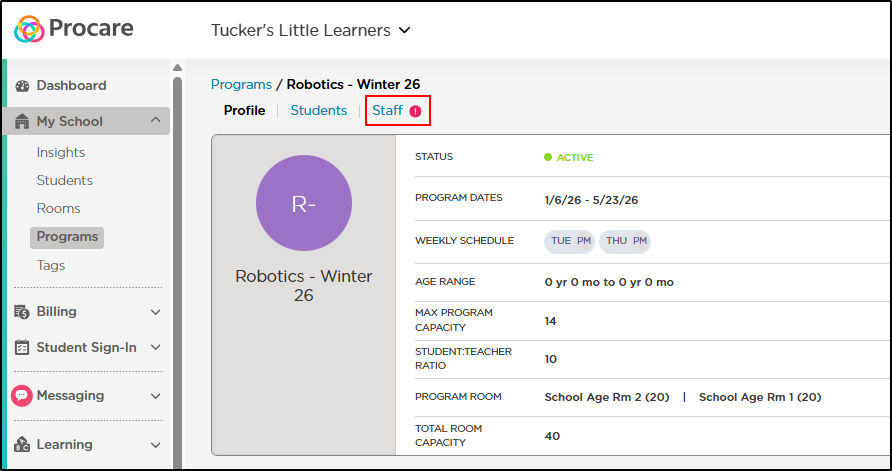
Programs allow you to create unique enrollment opportunities that are not specifically tied to a room. This also enables you to create additional revenue streams as students can enroll in multiple programs within the center. Programs can be assigned to one or multiple rooms and rooms can now offer multiple programs.
To help centers plan for the future, new insights are being added that will show administrators what their enrollment currently looks like for each program with staff-to-student ratios. This helps centers recognize which programs are in the highest demand and what openings are readily available for interested families to enroll their children into.
Creating a Program
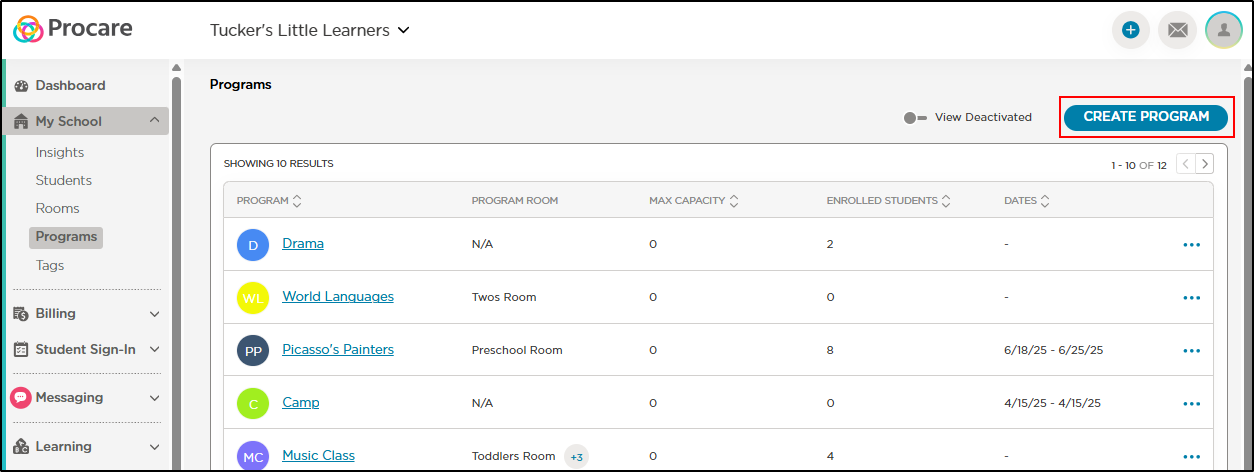
Navigate to My School > Programs.
Click Create Program.
Complete the Create Program details and click Continue.
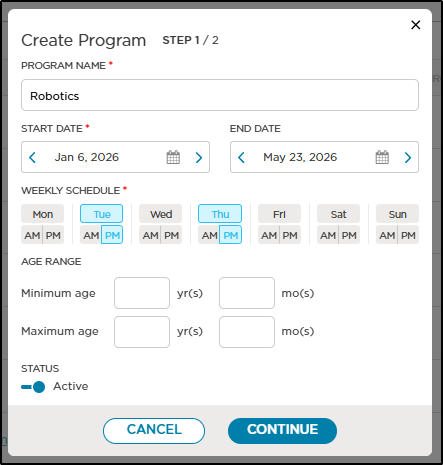
Enter the name of your program
Select the program's start date (required) and end date (optional)
Choose the Weekly Schedule. Deselect a day/time by clicking on each item. Selected days/times are in blue
Enter the age range for the program
Set the status to Active.
Complete the Set Capacity and Ratios pop-up, then click Create Program.
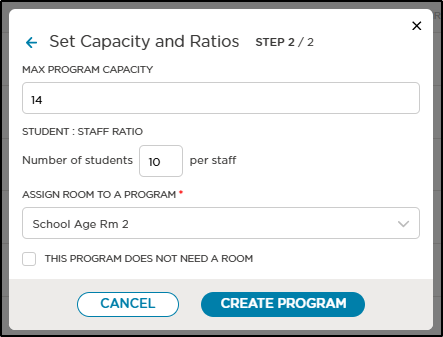
Enter the maximum program capacity
Enter the number of students per staff
Use the drop-down to assign one or more rooms to your program (required) or select 'This program does not need a room'.
Once your room has been created, you will see a success pop-up.

Click Close to go back to the Programs screen.
Click Continue to enroll students and assign staff to your new program.
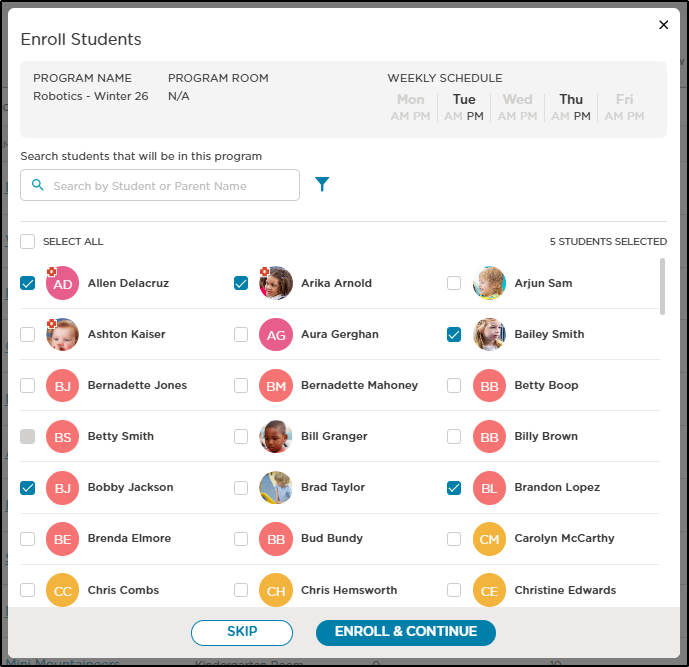
Select the students you wish to enroll and click Enroll & Continue.
Choose your staff to assign to the program, then click Assign Staff.
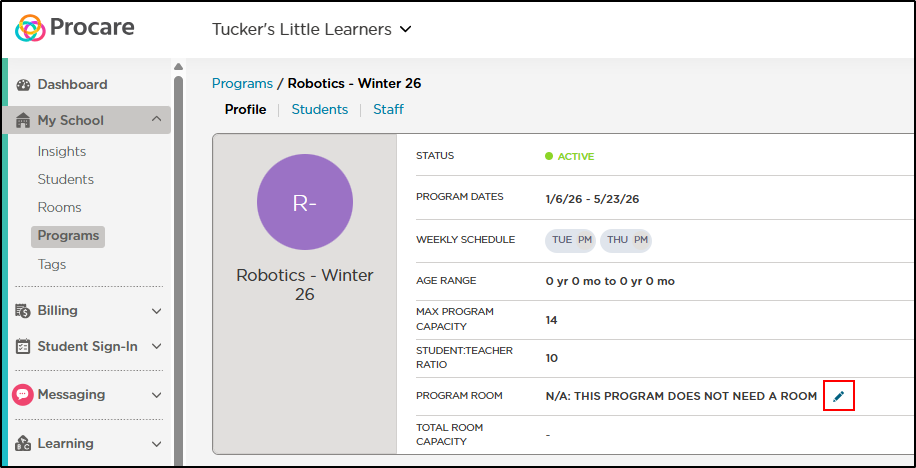
Assign a Room to a Program
If a program was created without assigning a room, follow the steps below to add a room.
Navigate to My School > Programs and select the program.
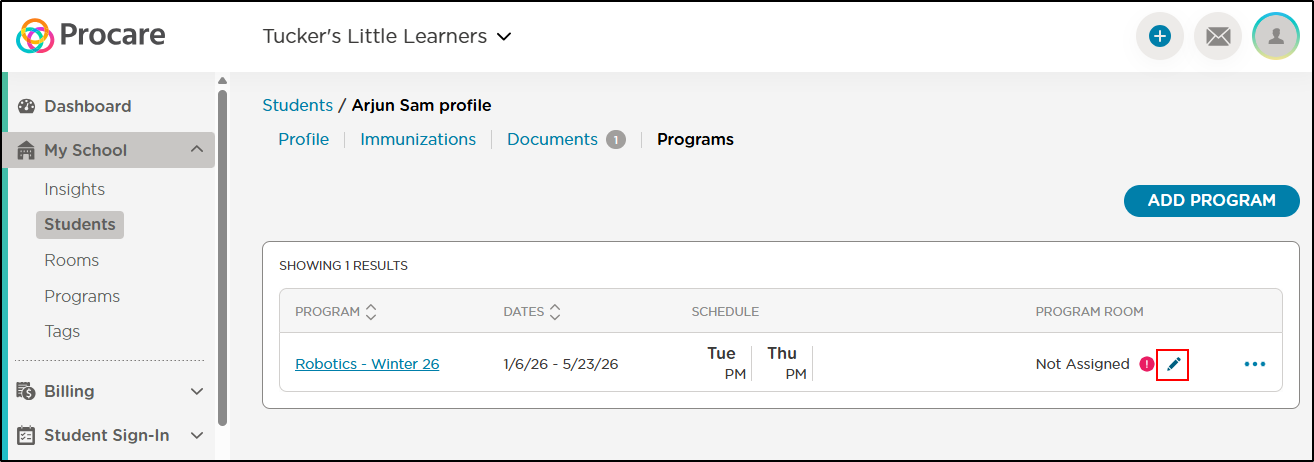
Locate the Program Room field and click the edit icon.
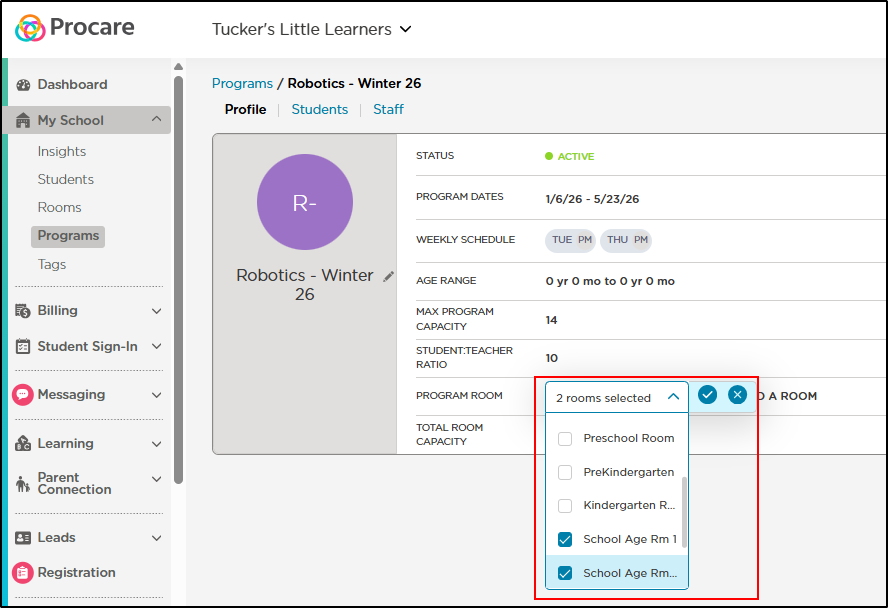
Use the drop-down to select one or more rooms, then click the checkmark.
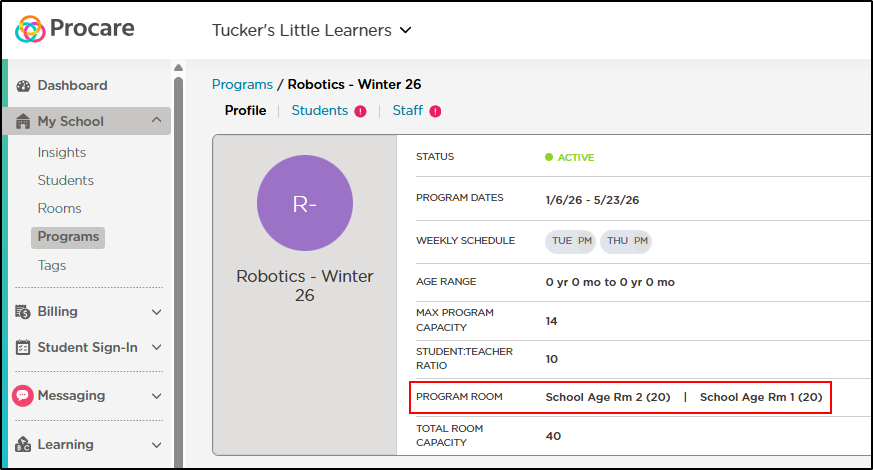
The selected room(s) and their capacities will be displayed in the Program Room field.
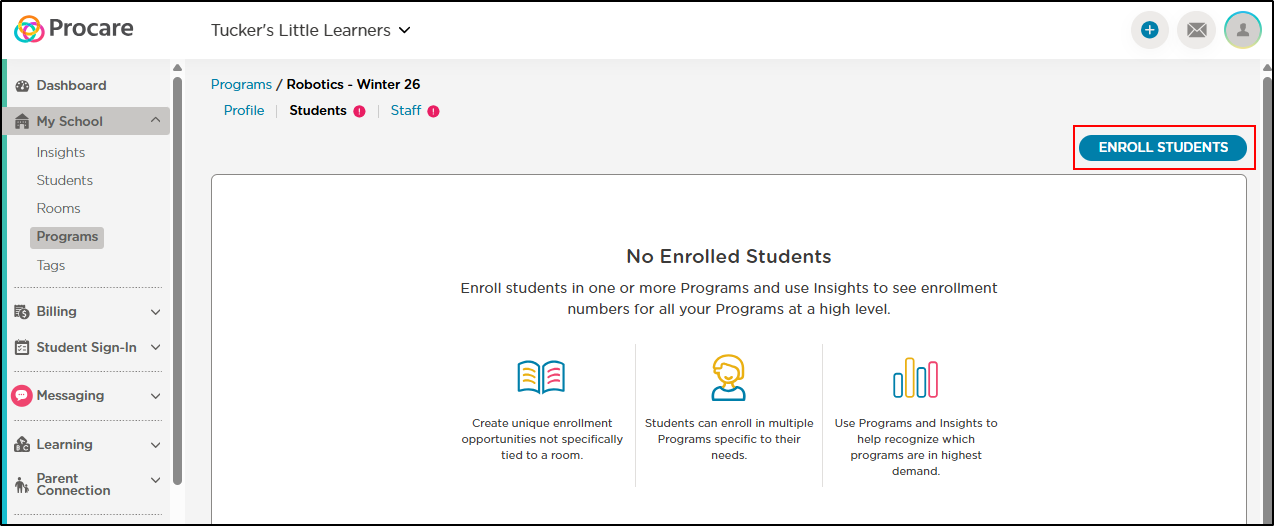
Enroll Students in a Program
Navigate to My School > Programs and select the program.
Click the Students tab.
Click Enroll Students.
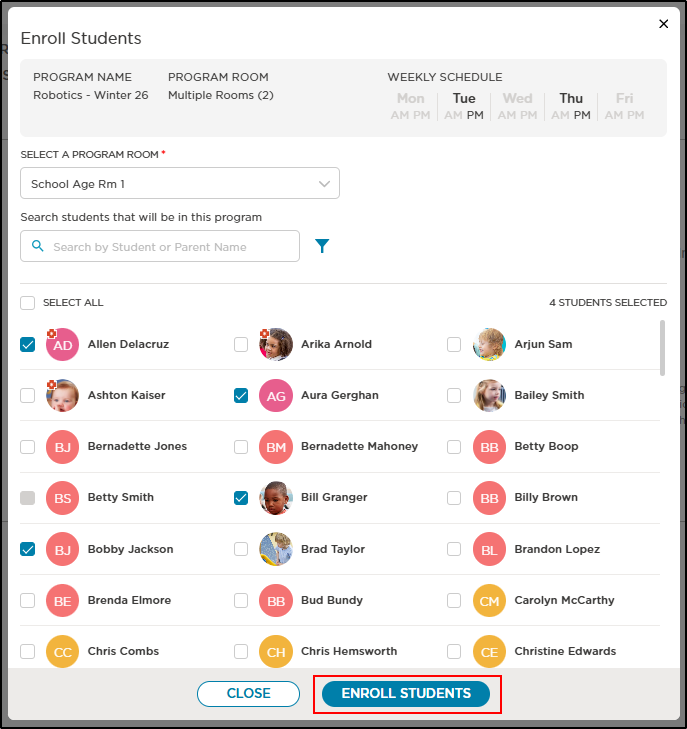
On the Enroll Students pop-up, the program details will display at the top. If multiple rooms are assigned to a program, use the Select a Program Room drop-down to begin assigning students.
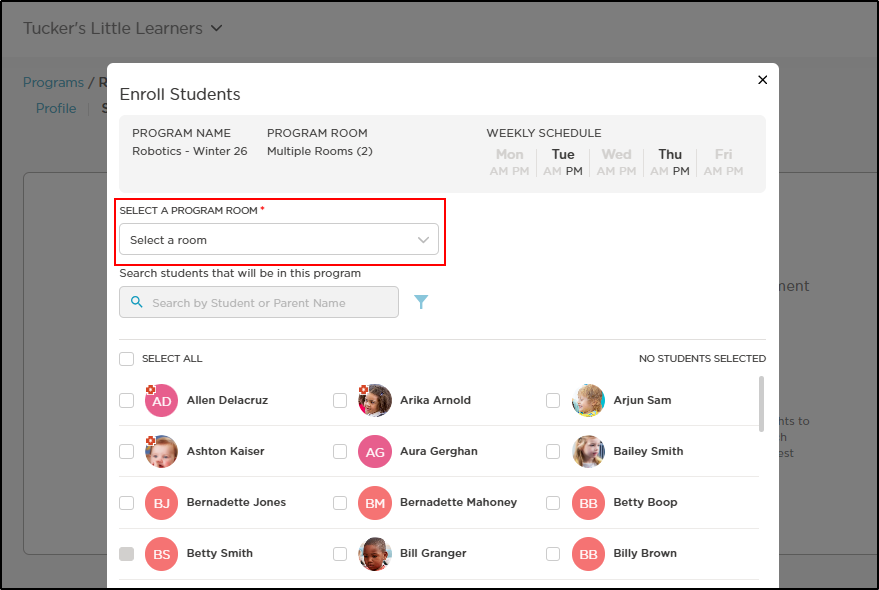
Select the student(s) to enroll in the program, then click Enroll Students. Please Note: Deselecting any selected students from this screen will remove them from the program.
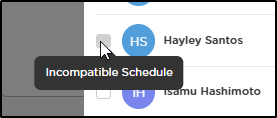
If a student's checkbox is grayed out, it indicates their schedule is not compatible with the program schedule.
The selected students are now enrolled in the program for the selected room. If there is more than one room assigned to the program, repeat these steps for the other room.
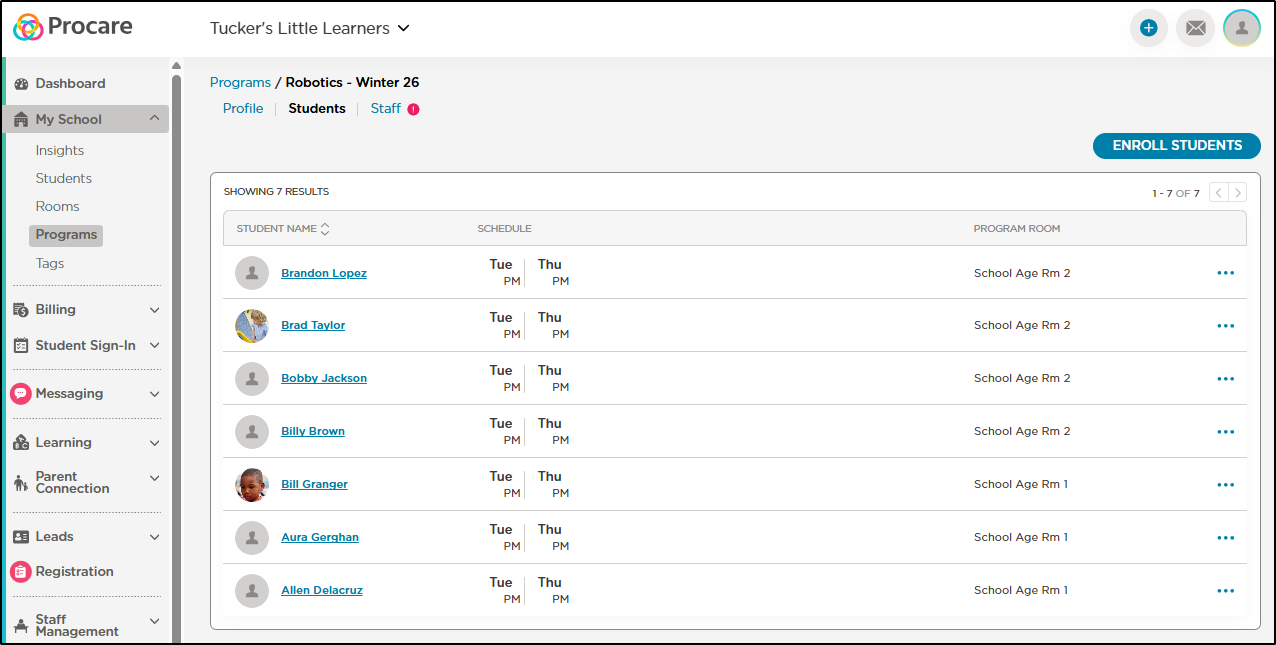
Use the More Actions icon to the right of each student’s name to view their profile, reassign them to a new program and remove the student from the program. The student’s program schedule can also be edited by clicking the edit icon to the right of the schedule column.
Assign Staff to a Program
Navigate to My School > Programs and select the program.
Click the Staff tab.
Click Assign Staff.
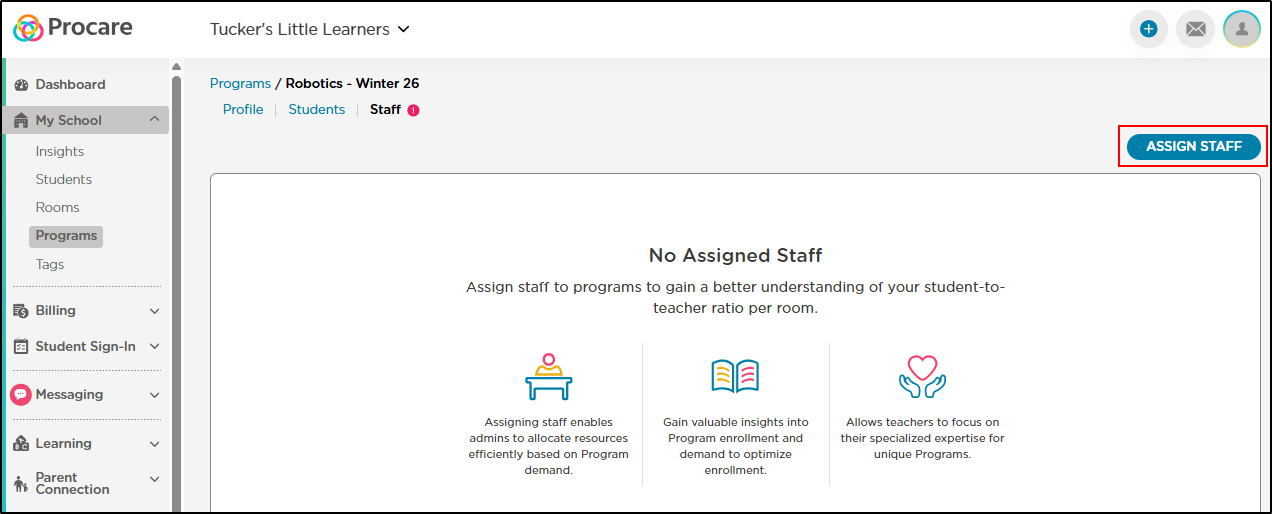
If multiple rooms are assigned to the program, use the Select a Program Room drop-down. Select the staff members you wish to assign to the program and click Assign Staff. Repeat these steps for multiple rooms.
Add a Program from the Student Profile
To add a program from a student’s profile, follow the steps below:
Navigate to My School > Students, then select the student.
Click the Programs tab.
To add a program, click Add Program.
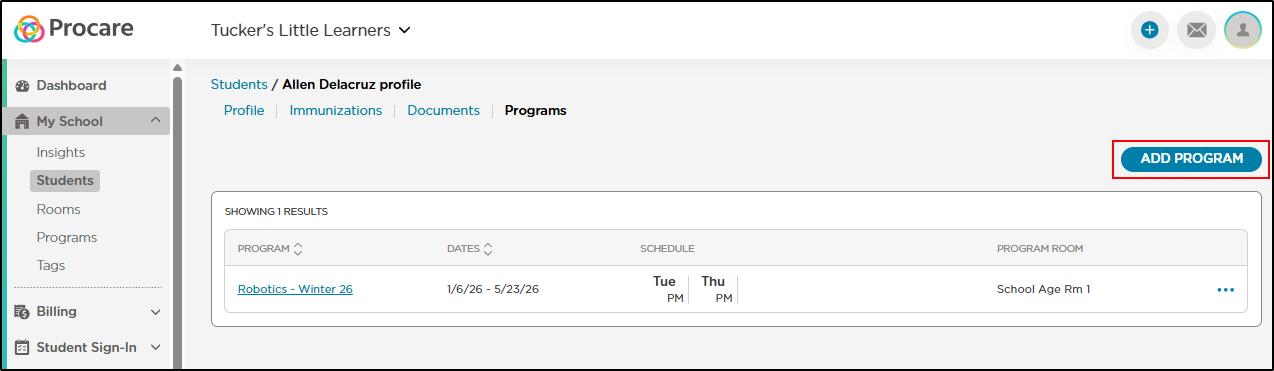
Use the drop-down to select a program, then click Enroll.
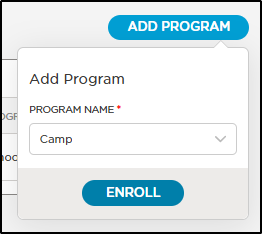
Under Program Room, click the edit icon and select a room.
Remove a Program from the Student Profile
To remove a program from a student’s profile, follow the steps below:
Navigate to My School > Students, then select the student.
Click the Programs tab.
Locate the program you wish to remove from the student and click the More Actions icon.
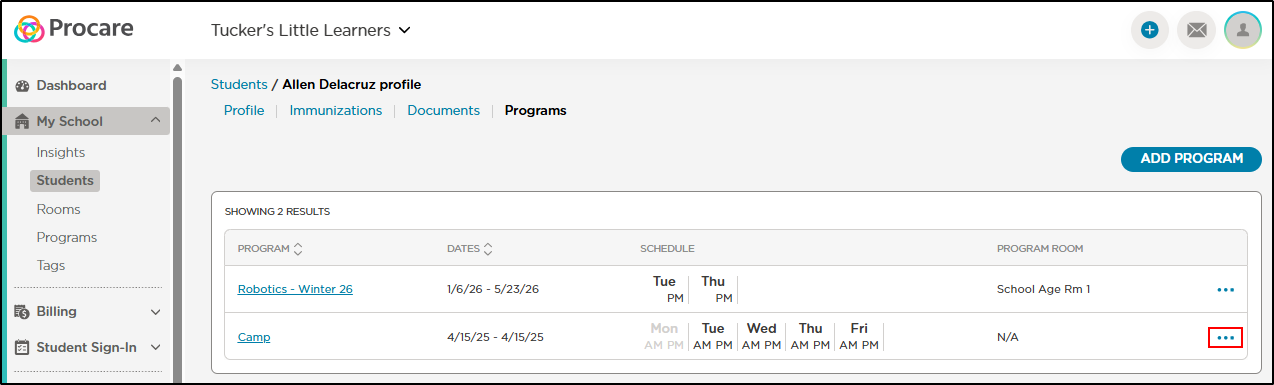
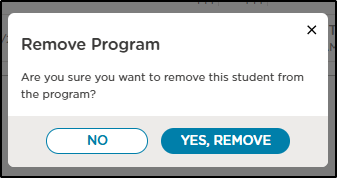
Select Remove Program, then click Yes, Remove on the confirmation pop-up.
FAQ
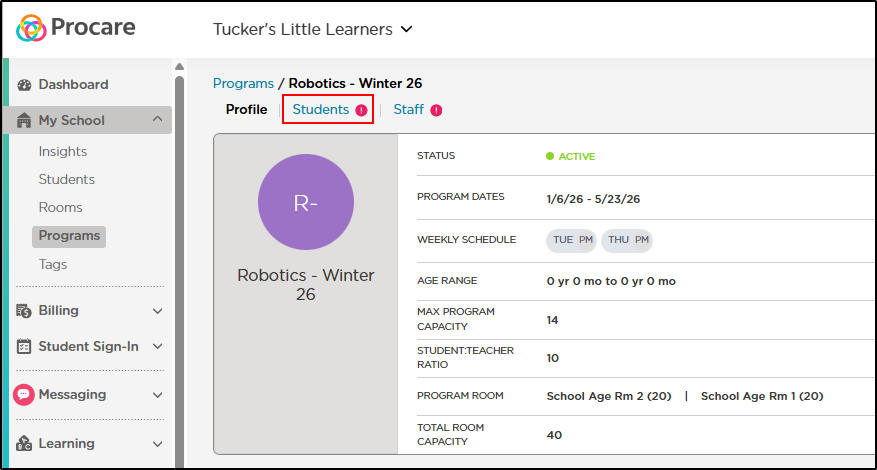
Why do I see pink exclamation points next to the Students and/or Staff tabs of my program?
The exclamation points indicate that no students have been enrolled and no staff have been assigned to the program. These visual cues help identify programs that still need setup.
Is an error message displayed when the child does not fall within the program's age range, or when the child ages out?
No error message is displayed when selecting a child whose age falls outside the program’s defined age range. The age range serves as a filtering tool to help narrow the list of students available for enrollment.
Note: The student’s date of birth must be completed on their profile for age-based filtering to function correctly.
Are there any reports related to Programs?
Not at this time.