How to assign or change default rooms for students
When a room is assigned to a student, that room will be their default room. When a parent signs their child in, that child will automatically be placed into the default (assigned) room. Student Tags, such as age, grade and regular classroom, can be added for an additional layer of filtering.
For Extended/After Care Providers
We recommend assigning your aftercare room as the default room for all students. This will make the sign in process easier for staff when taking student attendance.
Assigning a Room to One Student via the Web
Navigate to My School > Students and select the student you wish to assign a room to.
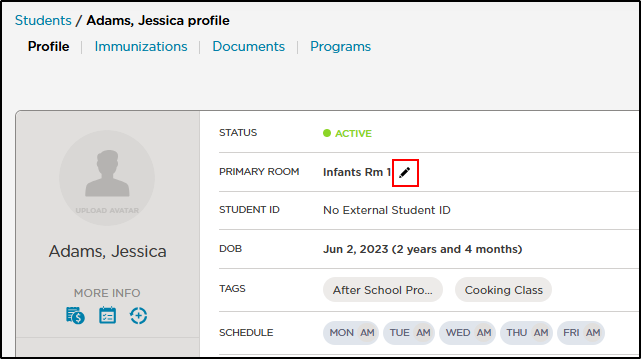
Locate the Primary Room field and click the pencil icon.
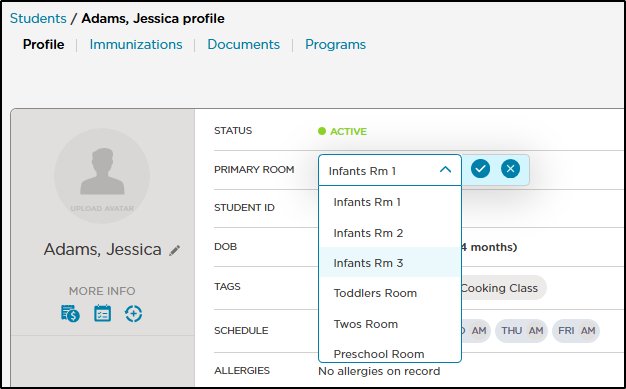
Use the drop-down to select the default room, then click the blue check-mark.
Assigning a Room to One Student via the Mobile App
From the home screen, select the student
Click "Profile" in the top right corner

Locate the "Assigned Room" field
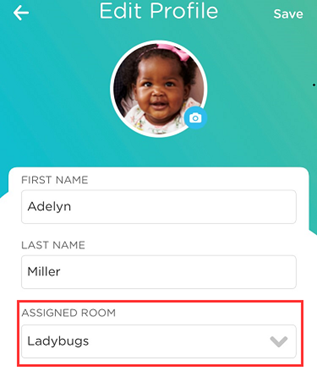
Select the room and click the checkmark to confirm. Then click "Save" in the top right corner

Assigning a Room to Multiple Students via the Web
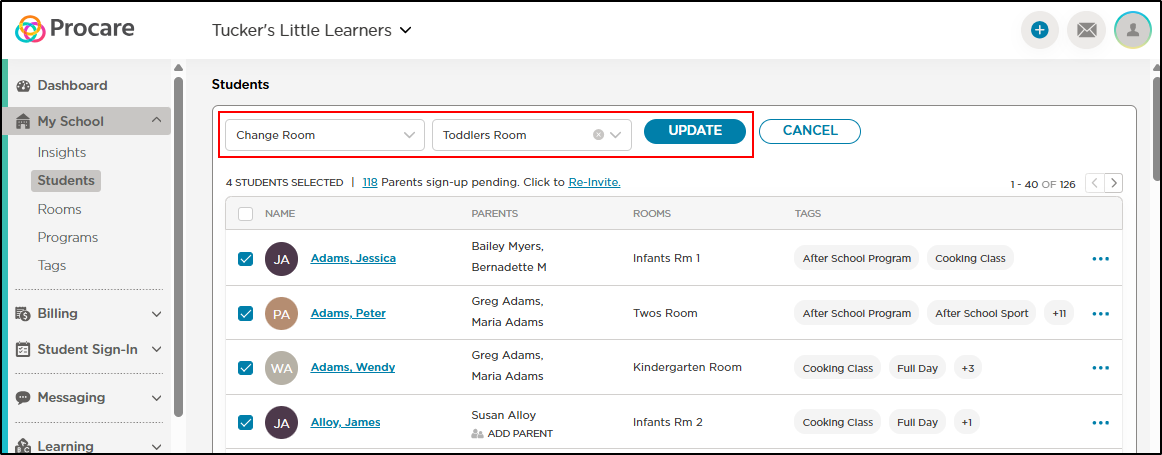
Navigate to My School > Students. Place a checkmark next to each student to assign a default room.
Use the Select Batch drop-down and select Change Room.
Choose the new room from the Select Room drop-down.
Click Update.
Note
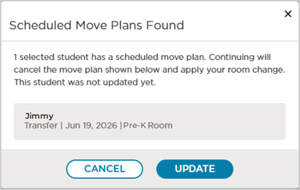
This message displays when you are using the Batch Action feature and a conflict occurs with a RoomRunner move plan.
Options
Click Cancel to stop the Batch Action you started. You are returned to the Students window, and no changes are made.
Review the student(s) impacted and click Update to continue with the Batch Action or
Click X to leave this window. This stops the Batch Action you started. You are returned to the Students window, and no changes are made.
Learn more about RoomRunner Move Plans.